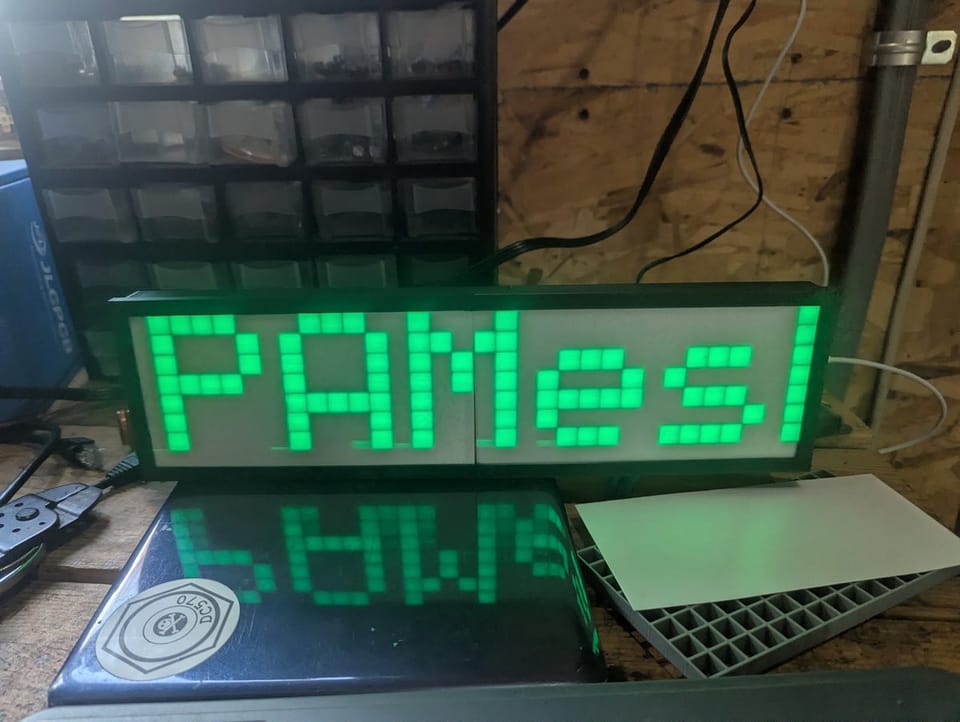
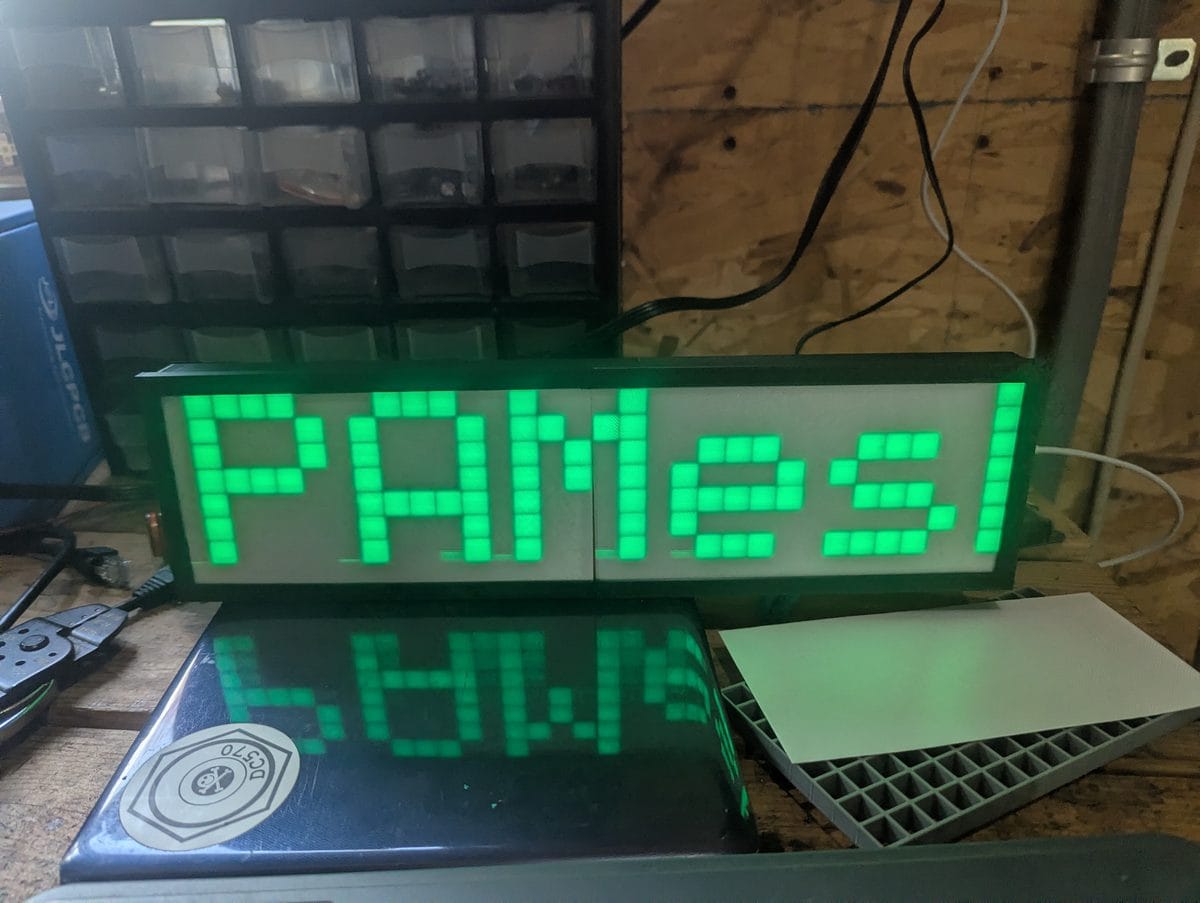
I Built a Glowing Sign That Scrolls the Mesh (Because I Had the Parts and a Free Saturday)
It started because I was bored and I had a parts bin. Those two things together are responsible for most of the projects in this shop.
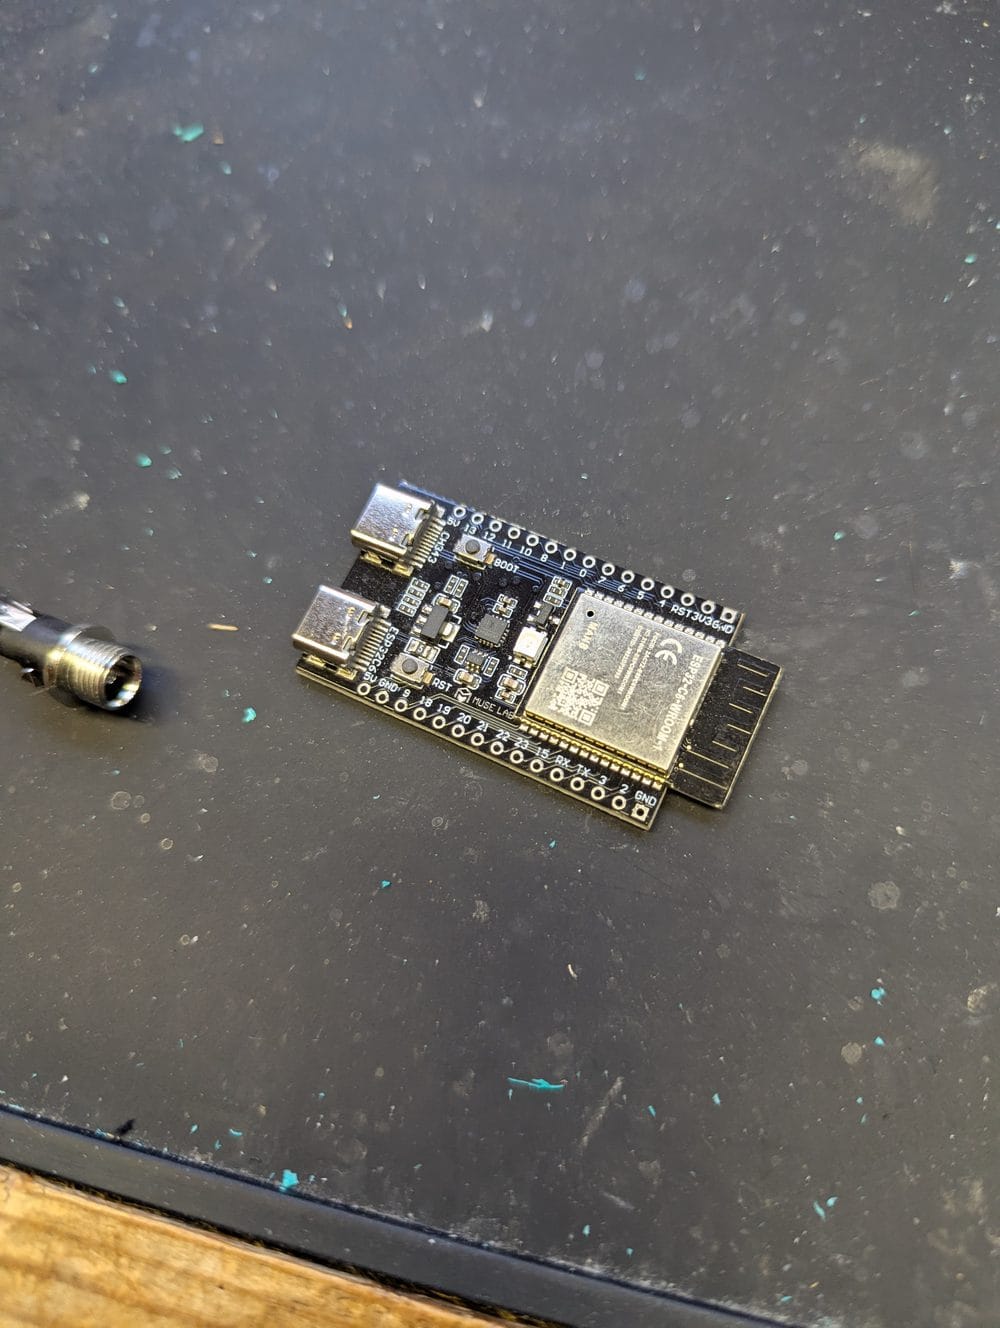
I'd ordered a two-pack of 8x32 WS2812B LED matrices back in the winter. They sat unused until last weekend. I had an ESP32-C6 dev board that had never been flashed. I had the NEPAMesh MQTT broker running and pushing traffic. I had a free Saturday, and then some early mornings.
What I didn't have was something physical, something on the bench that just quietly showed me what was happening on the network without me having to look at a screen. The AD5X handled the final case, the beta case was produced using the same style 3D printer at Hackworks. The ESP32 handled the rest.
What it does
The ESP32 connects to WiFi, subscribes to the NEPAMesh MQTT broker, and listens. Every Meshtastic packet that comes through gets decrypted and checked. Text messages scroll across the panel as Callsign: message in your choice of color. NodeInfo packets get captured so the firmware can resolve node IDs to callsigns automatically. First time a node transmits it shows as !XXXXXXXX. After it broadcasts its name, you see the callsign from then on.
When no messages are coming in, the panel switches to a live clock. More on that below.
On boot it runs a red, blue, green snake across every LED. All 256 of them. That's your "the wiring works" check before you spend time debugging firmware that isn't the problem.
The case

Bare WS2812B panels are harsh. You're looking directly at individual LEDs and the hot spots are distracting at any reasonable brightness. A 3D printed frame with a diffuser fixes that immediately.
I used this frame from Printables: https://www.printables.com/model/709980-8x32-led-matrix-frame-with-diffuser-grid. Two-piece design, prints without supports, sliced and sent to the AD5X. The diffuser grid makes a bigger difference than you'd expect. Text goes from "pointy LED dots" to "readable sign" immediately. If you have a printer, do this part. It's worth the filament.
The hardware
Parts list is short:
- ESP32-C6 dev board (or any standard 38-pin ESP32 -- the firmware supports both)
- 8x32 WS2812B LED matrix -- the SVFISHKK ones on Amazon come in a two-pack, which is how I ended up with a spare in the first place
- 5V power supply, 3A minimum -- this is the part people skip and then wonder why the panel flickers
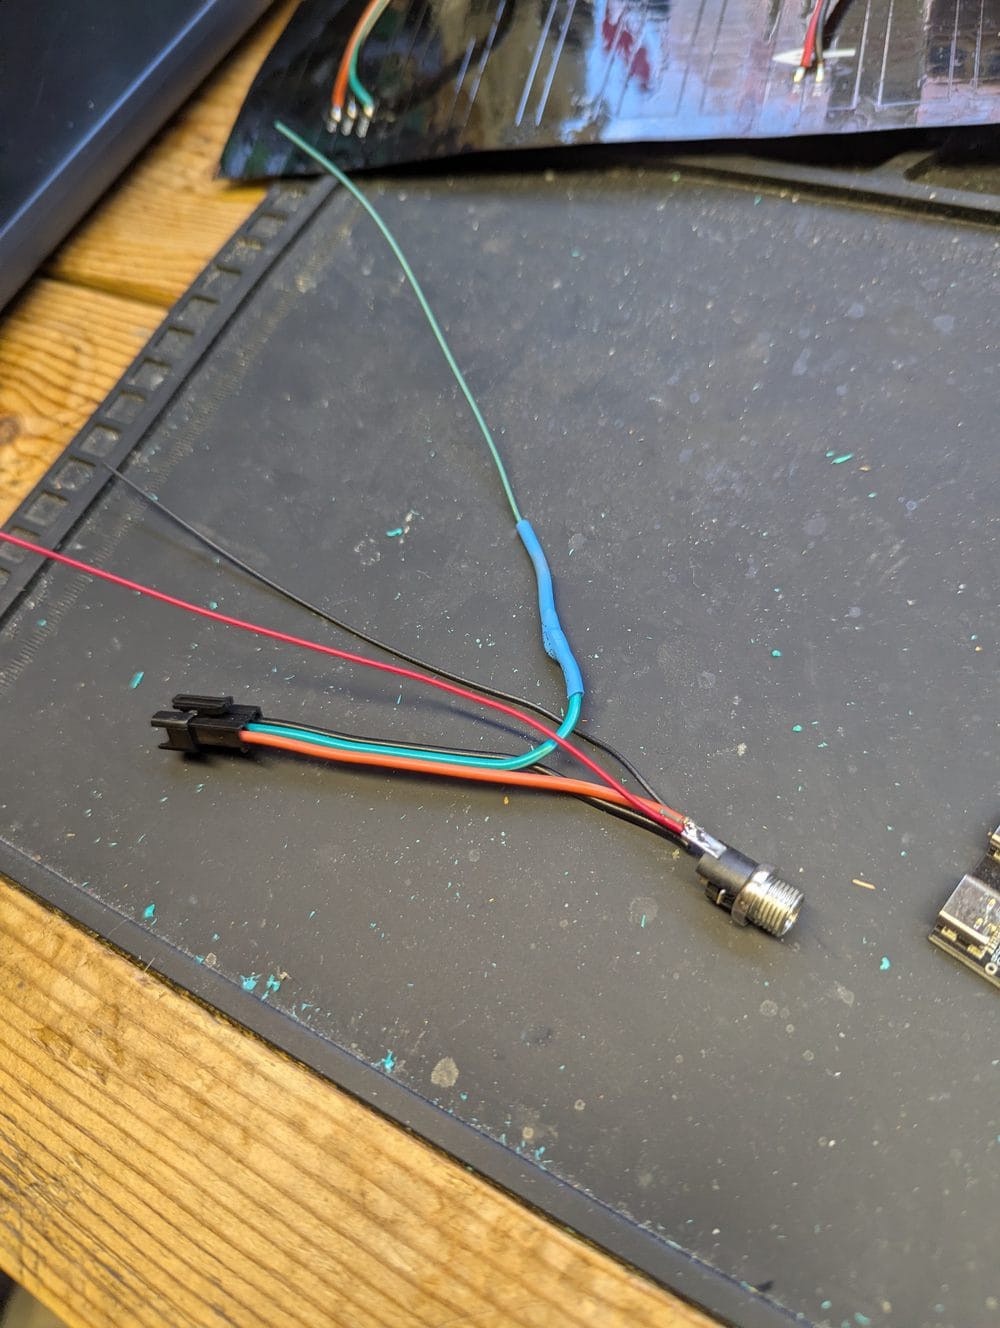
- Three short wires, a 300-500 ohm resistor for the data line, a 100 uF cap across the panel's power pads
The resistor and cap are cheap insurance. The resistor prevents the first LED from taking a voltage spike on power-up. The cap absorbs inrush current when you plug in. Skip them if you want, but don't say I didn't mention them (FWIW I live dangerously and skipped them, if the panel dies, I have the spare [forward thinking with the two pack]).
One rule that will save you an hour of confusion: the ESP32 and the LED panel must share a common ground even when they're on separate power supplies. If they don't, nothing works and the symptoms look like a firmware problem when it isn't.
The encryption part
Meshtastic encrypts everything. This is correct behavior. The default channel (LongFast) uses a well-known public key that every Meshtastic device ships with. It's less of a secret and more of a standard -- the difference between a shared channel and a private one.
When a packet arrives over MQTT, the firmware decrypts it, checks whether it's a text message or a NodeInfo update, and acts accordingly. Telemetry and position packets are silently dropped -- they never touch the display. If your mesh uses a custom channel PSK, you swap in your own 16 bytes in the source and recompile. One variable change.
The clock
This was the feature that turned it from "useful" into "actually something I want on the desk permanently."
When no messages are scrolling, the panel shows the current time in H:MM format. It syncs to NTP on boot -- no configuration beyond setting your UTC offset in the web UI. The clock updates every minute. As soon as a message finishes scrolling the clock reappears immediately, it doesn't wait for the next tick.
If NTP hasn't synced yet the clock is suppressed and the panel stays dark between messages. Watch the log page on first boot for [CLK] NTP synced to confirm it's working.
Scheduled messages and date display
Two background timers run when the device is idle, both configurable from the web UI without touching the code.
Custom message: set a message and an interval in minutes. Every time that many minutes tick over on the clock, the message scrolls across the panel. Set the interval to 0 to disable it. A message like "Check us out at NEPAMesh.com" on a 60-minute interval scrolls at the top of every hour, whether or not any mesh traffic has come in.
Date display: same idea, different content. Set an interval and the panel will scroll the current date in long form -- "May 21, 2026" -- every N minutes. If the custom message and the date display are both scheduled for the same minute, the date is skipped so they don't overlap.
Together these make it useful as a lobby sign or desk display that does double duty: mesh traffic monitor when the network is active, clock and date the rest of the time.
Setup
Open src/config.h, add your WiFi credentials, flash it. That's the only required step before the first boot.
Everything else lives in the web UI at the device's IP address. Settings persist across reboots. You never need to touch the code again unless you change WiFi networks.
/dev/ttyACM0 instead of the usual /dev/ttyUSB0. You also need to add yourself to the dialout group and install PlatformIO's udev rules before it'll flash. The README covers all of it. The number one thing people miss: you have to log out and back in after usermod, not just close the terminal.Web interface
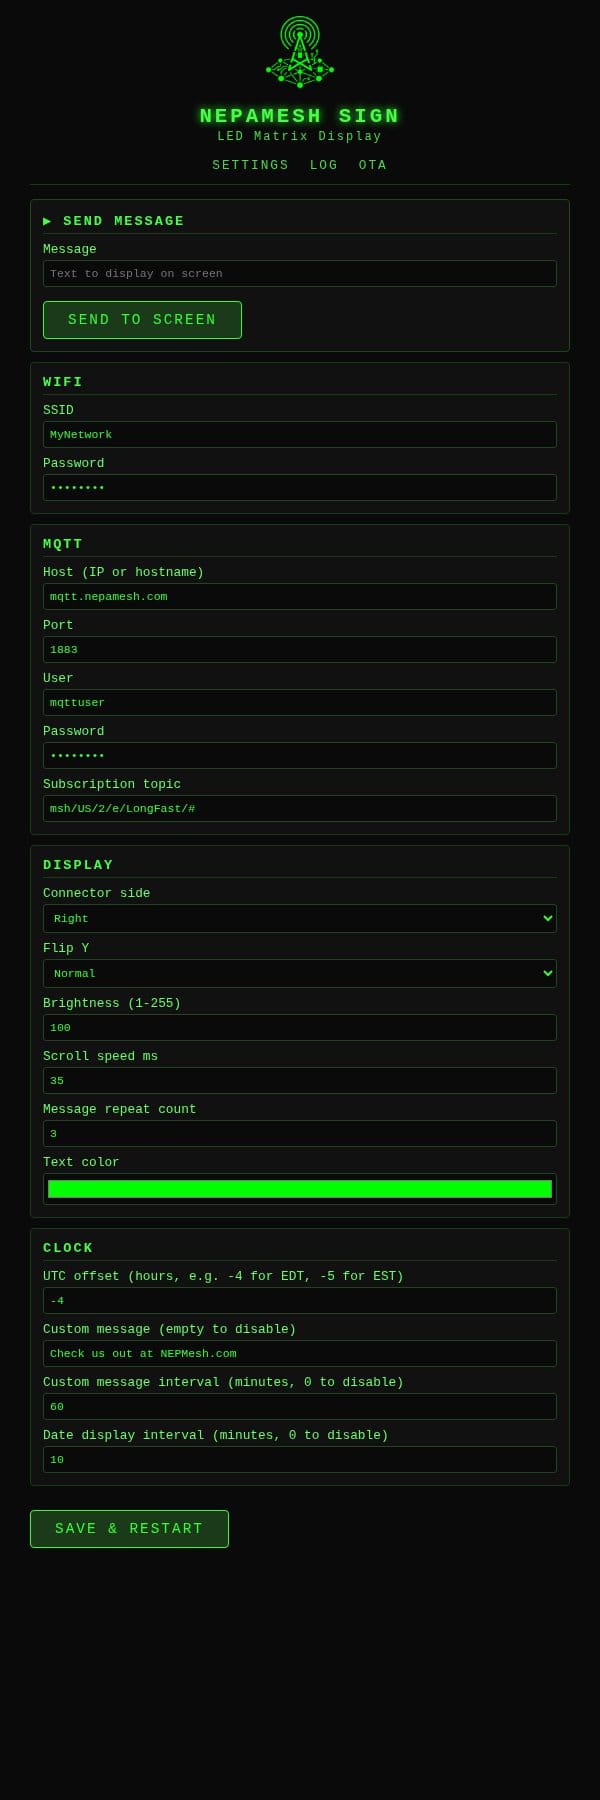
The settings page covers everything: WiFi credentials, MQTT host (accepts a hostname like mqtt.nepamesh.com or a direct IP -- the firmware does its own DNS lookup), display orientation, brightness, scroll speed, text color, UTC offset, and the two scheduled message timers. Hit Save and Restart, device reboots with everything stored in flash.
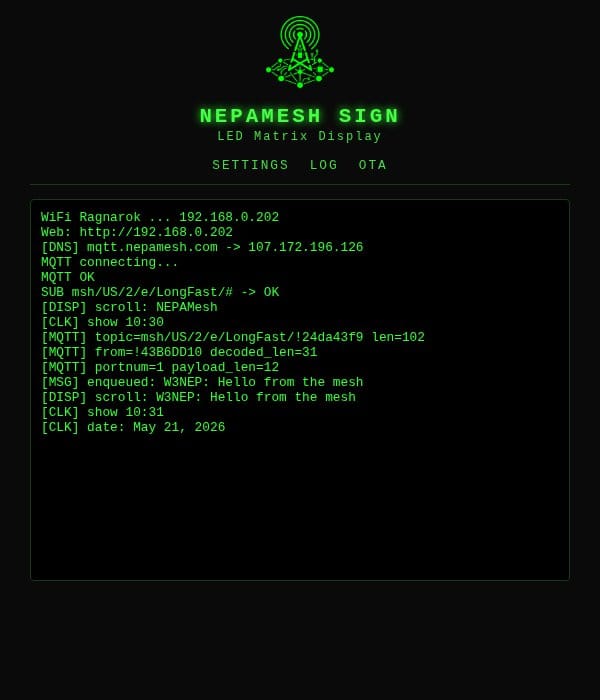
The log page is where you go when something seems off. You can watch DNS resolution, MQTT connection, NTP sync, and message decoding all in real time from any browser on the network. No USB cable, no serial monitor.
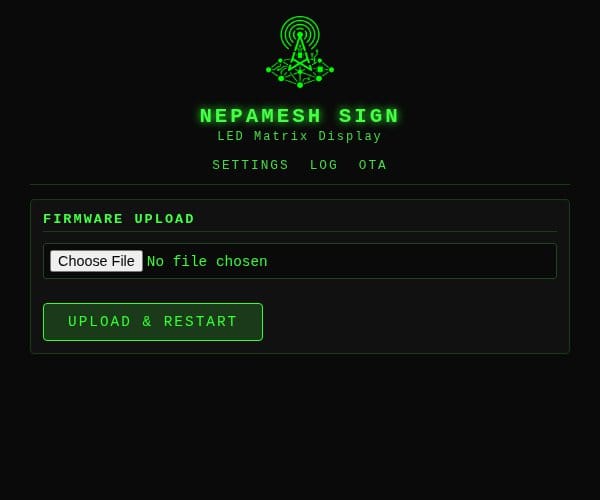
Once it's running, firmware updates happen over the browser. Build, upload the .bin to /ota, done. This is how software updates should work, especially considering how long the serial connection takes to push the firmware.
Get the code
Everything is on GitHub -- platformio config, full source, and the build guide in PDF form:
https://github.com/nepamesh/led-mqtt-meshtastic-8x32
If you build one, drop a photo in the Discord.