Build a Better Antenna for Less than $10 and an Afternoon
The rubber duck antenna that shipped with your Meshtastic node is not your friend.
I know. It looks official. It has a connector on the end and everything. But those stubby little antennas are optimized for one thing: fitting in a retail box. They're short, they're mismatched, and they're leaving signal on the table. The good news is that 915 MHz antennas are small, the math is approachable, and you can build something genuinely better for about the cost of a cup of coffee.
This post covers three builds, a quarter-wave ground plane, a half-wave dipole, and a Slim Jim, starting from the simplest and working up. All three use common wire and cheap connectors. None of them require a soldering iron that costs more than the antenna.
One note on units: everything here is in millimeters. I normally try to give specs in freedom units, but at 915 MHz the imperial equivalents get ridiculous fast. 82mm is clean. 3.228 inches is a cry for help. SI it is.
Radio theory has a reputation for being ancient mystical dark magic. Smith charts, complex impedance, enough Greek letters to fill a fraternity house. Most of it doesn't matter for what we're building here. Cut the wire to the right length, solder it to the right connector, point it up. That's genuinely 90% of the job.
And on the math: perfect is the enemy of good. The lengths in this post are targets, not commandments. A millimeter off is fine. Five millimeters off might matter. Ten and you'll notice. Cut long, trim short, and don't let the numbers intimidate you out of starting.
Antenna Theory: The Part You Actually Need to Know
Antennas are tuned to a specific frequency by making them a specific physical length. Radio waves travel at the speed of light, approximately 299,792,458 meters per second. At 915 MHz, the wave completes one full cycle in:
λ = c / f
λ = 299,792,458 / 915,000,000
λ = 0.3276 m = 327.6 mm (about 12.9 inches)
That's your wavelength. Everything else is fractions of it.
Antennas resonate, they efficiently transfer energy from your radio to the air, when their physical length matches one of those fractions. The most useful ones are quarter-wave (λ/4) and half-wave (λ/2). At resonance, the antenna's impedance is mostly resistive, which means your radio's power actually goes into the air instead of bouncing back and heating up the transmission line. That bounce-back is measured as SWR (Standing Wave Ratio). You want it close to 1:1. Your rubber duck is probably running SWR north of 2:1 at 915 MHz. Ask me how I know.
Gain is how much an antenna focuses its signal in a particular direction compared to a theoretical perfect sphere (called an isotropic radiator). A dipole has about 2.15 dBi, not because it's stronger, but because it squishes the pattern into a donut shape instead of radiating equally in all directions. Gain is geometry, not amplification. Keep that in mind when someone tries to sell you a "12 dBi omni" for $8.
One practical shortening note: the signal travels slightly slower in wire than in free space, so your physical cut length ends up about 95–97% of the theoretical number. For rough cuts, using the full theoretical length is fine. For tuning, trim from there.
Connectors: Figure This Out First
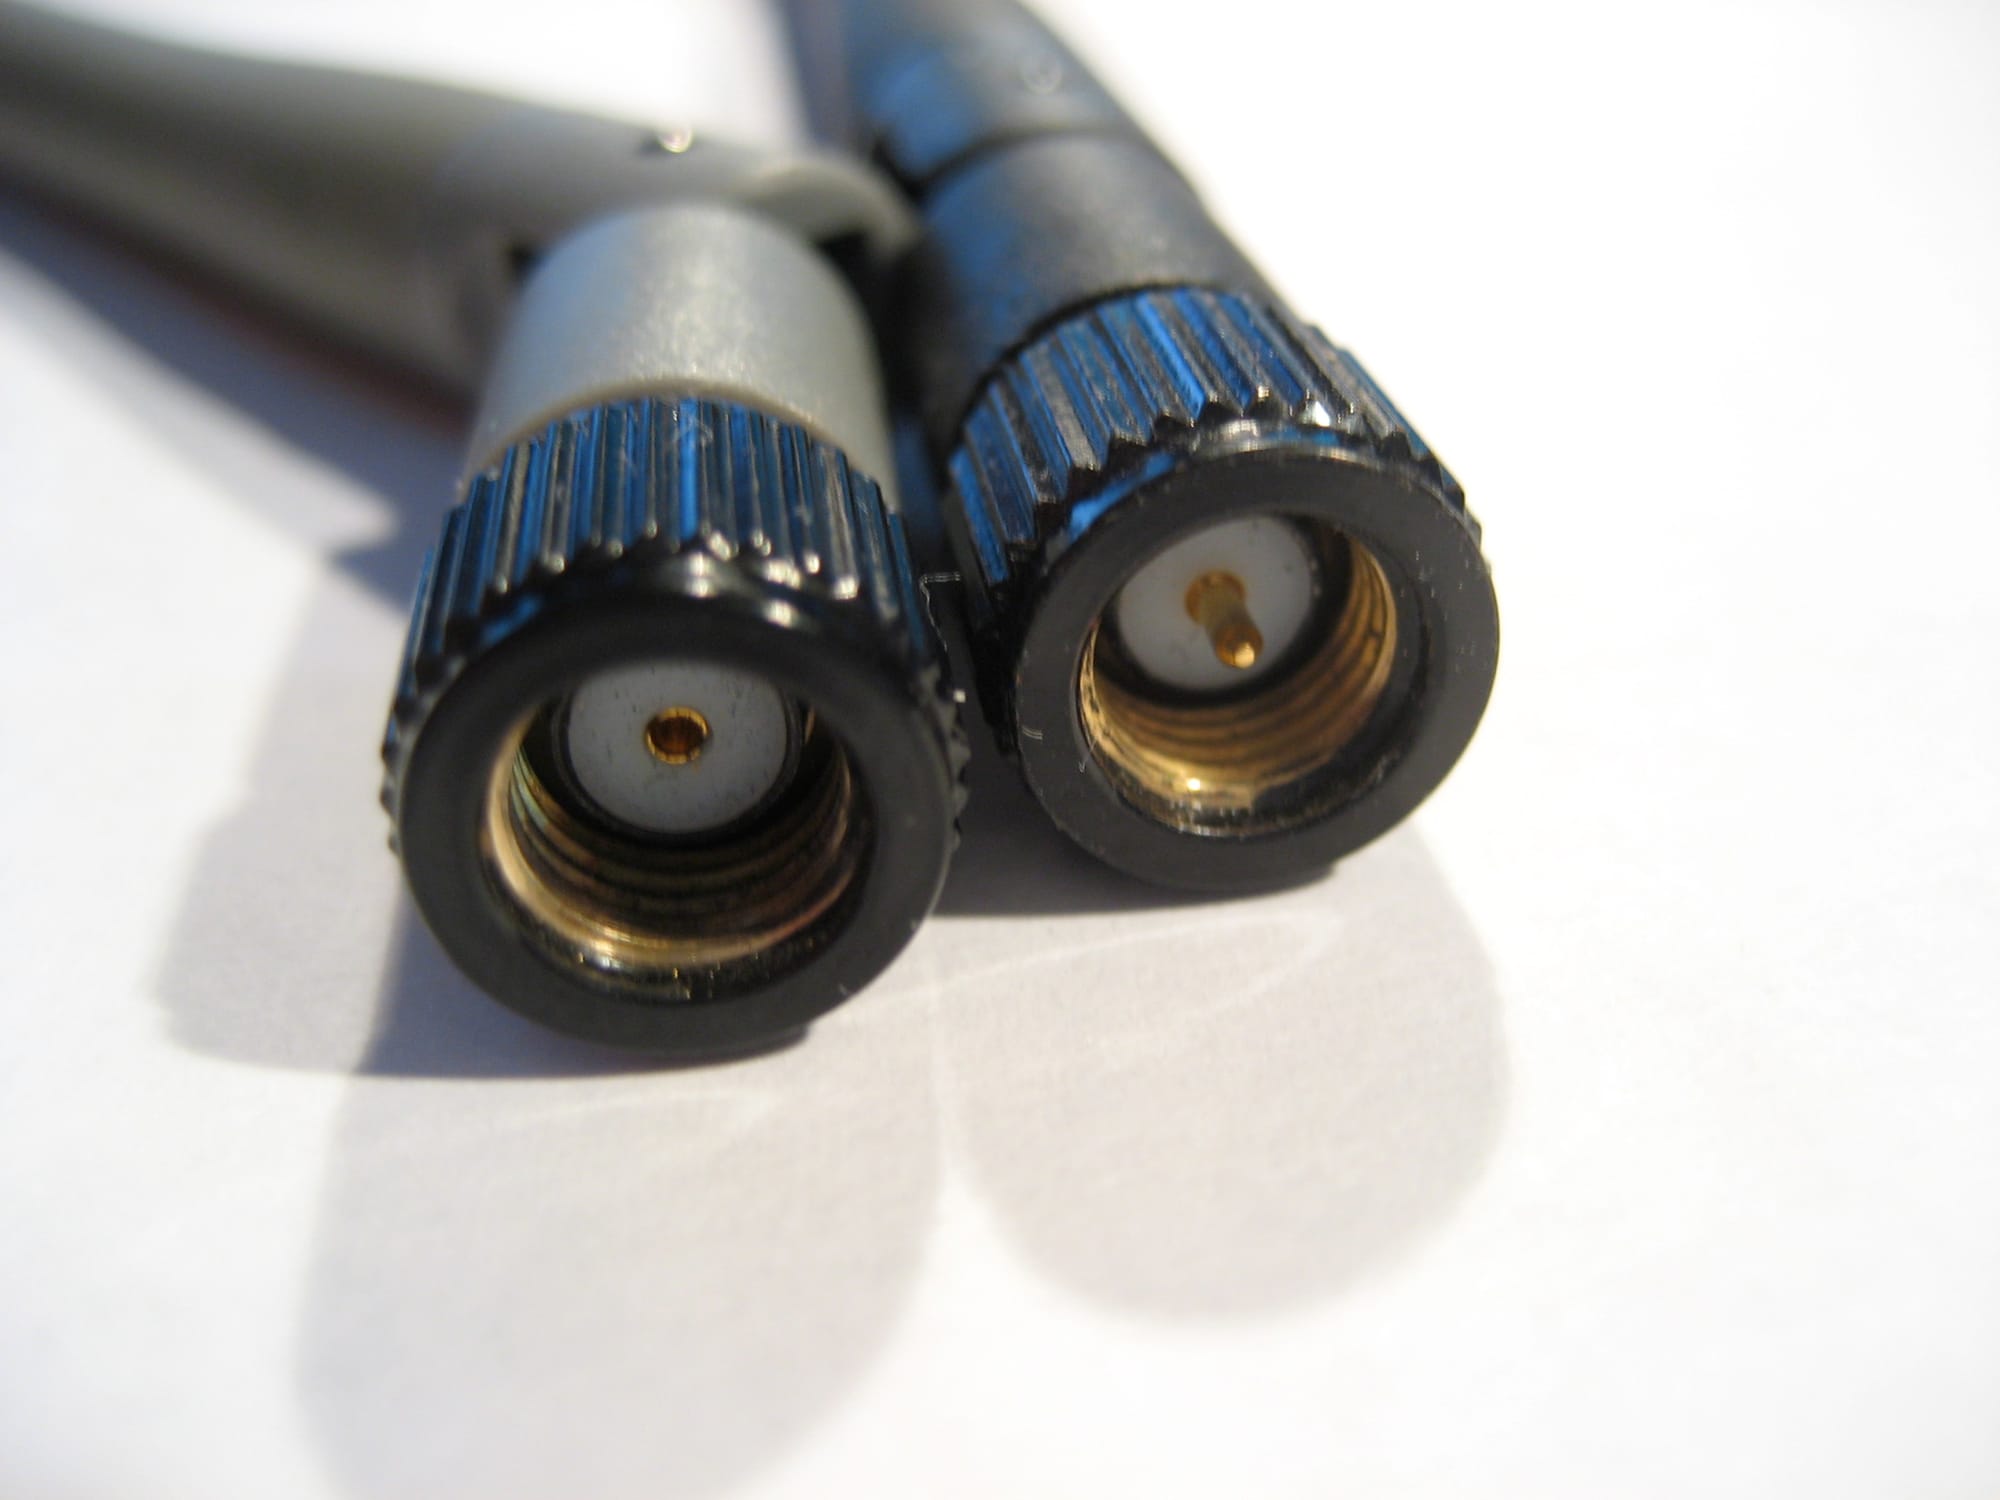
Before you build anything, figure out what connector your device has. Getting this wrong means waiting days for an adapter that costs $3. The outer shells of SMA and RP-SMA look nearly identical, same hex body, same thread pitch, and they will physically engage with each other just enough to feel right before you realize nothing is connected inside. Know which one you have before you order anything.
SMA vs. RP-SMA
SMA (SubMiniature version A) is the standard RF connector on most Meshtastic hardware. RP-SMA (Reverse Polarity SMA) is a variant where the center conductor gender is swapped relative to the outer shell. The threads are the same. The shell looks the same. The center pin is on the opposite side. They are not compatible with each other. Here's how to tell them apart:
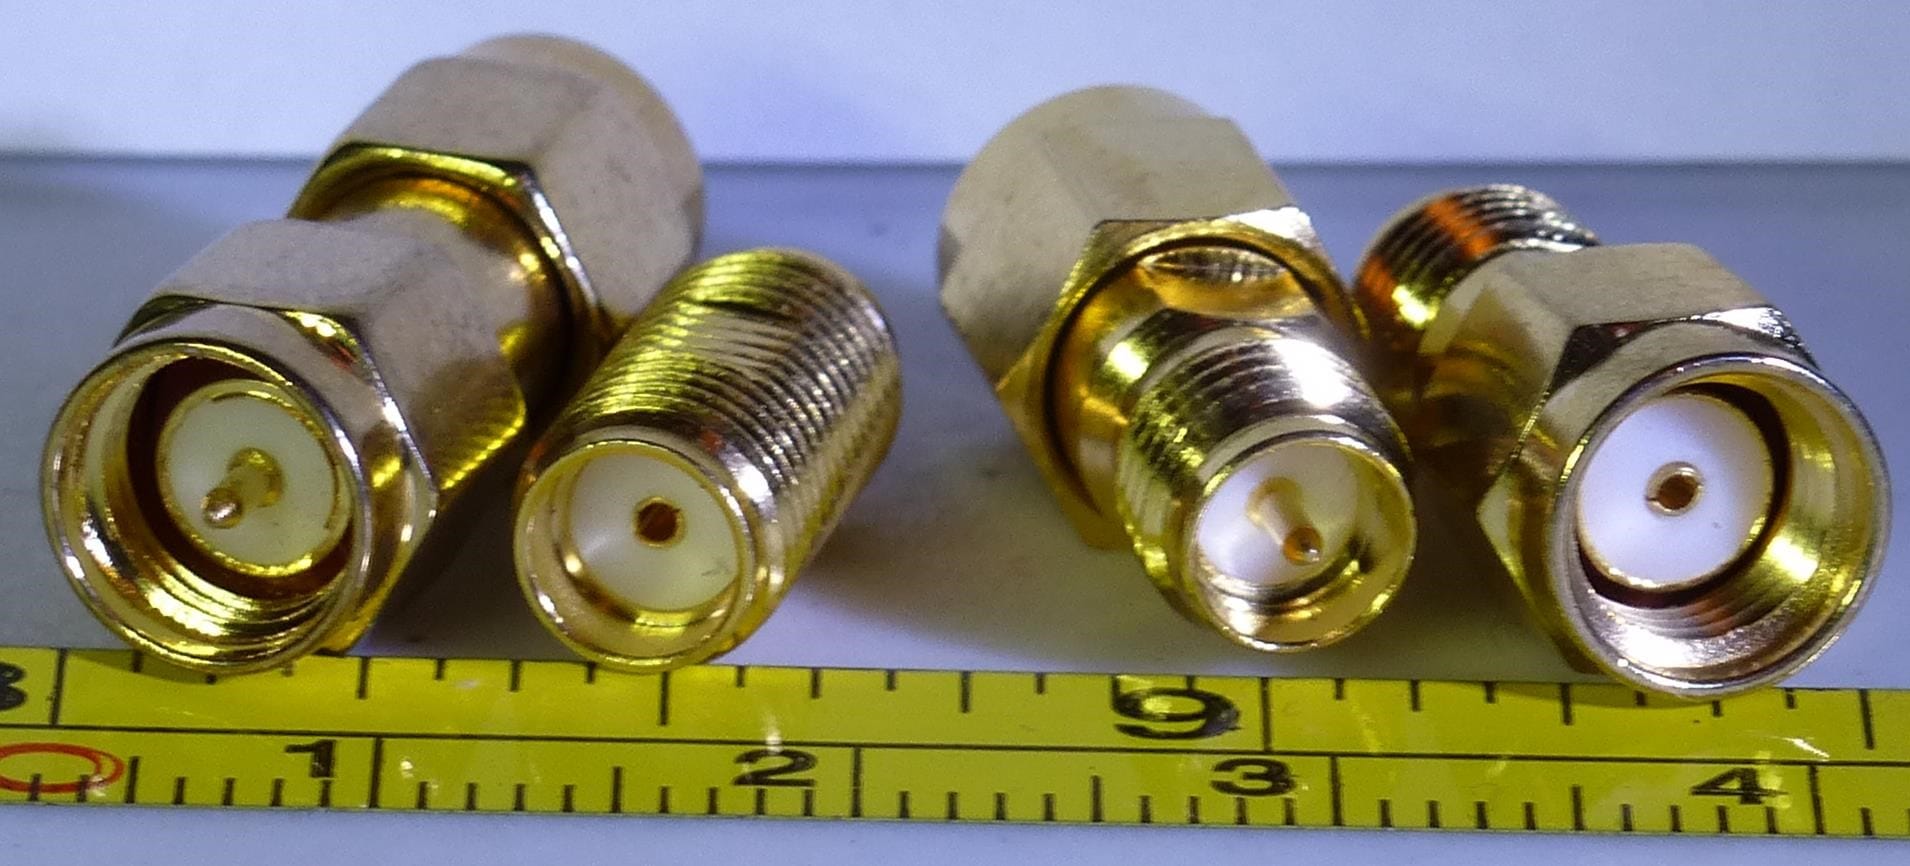
Standard SMA Male (plug): External threads on the barrel. Center pin sticking out from the plug face. This is what goes on your antenna or pigtail cable, it plugs into the board.
Standard SMA Female (jack): Internal threads (you see the inside of the barrel when you look at it). Center socket (hole) in the middle. This is what's on most Meshtastic boards.
RP-SMA Male (plug): External threads, looks like SMA male from the outside. But the center has a socket (hole) instead of a pin. The "RP" means the center conductor gender is reversed relative to the shell gender. Common on older WiFi gear and some cheap boards.
RP-SMA Female (jack): Internal threads, looks like SMA female from the outside. But the center has a pin sticking out. This is what you'll find on WiFi routers and some repurposed hardware.
The quick test: look at the center of the connector on your board. If you see a hole (socket), it's SMA female, you need SMA male on your antenna. If you see a pin, it's RP-SMA female, you need RP-SMA male. Most Meshtastic hardware (RAK WisBlock, Heltec V3, LILYGO T-Beam) ships with SMA female. If you bought it to run Meshtastic, it's almost certainly SMA. If someone handed you a mystery board off a shelf, check before you order.
One more connector you need to know about: U.FL (aka IPX, IPEX, MHF1)
The Heltec V3 and RAK WisBlock modules have a second connector hiding on the PCB itself, a tiny snap-on port called U.FL. You'll see it labeled IPX or IPEX in most listings; it's the same thing, just different brand names for the same MHF1 standard. It looks like a very small coax connector, about 2mm across, and it snaps on with a satisfying click.
If your board has one of these, you have a choice: use the external SMA port (if your board has one and it's wired to the same radio), or route a U.FL pigtail directly off the PCB to wherever your antenna lives. The pigtail approach is cleaner for custom builds, you skip the onboard SMA entirely and run your own coax out to the antenna.
One important note: U.FL connectors are rated for roughly 30 mate/unmate cycles. They're not meant to be plugged and unplugged daily. Run a pigtail, connect once, leave it.
For each antenna below, you have three connector options:
Option A. SMA female chassis mount connector
The body of the connector becomes the antenna's ground connection point. You solder the radiating element to the center pin and the radials (or ground wire) to the body. Clean, no coax needed. Then connect to your device's SMA port with a short SMA male-to-male jumper.
Option B. RG-174 pigtail with SMA male
A short length of thin coax with SMA male already crimped on one end and bare wire on the other. You strip the bare end, solder to your antenna elements, and plug directly into the device's SMA port. More flexible, easier to mount remotely.
Option C. U.FL pigtail to SMA female (for Heltec V3, RAK WisBlock)
A short cable with U.FL on one end and SMA female on the other. Snap the U.FL onto the PCB connector, then use the SMA female end as your antenna connection point, either solder directly to it or attach a homebrew antenna via SMA male. Best option if you want to keep the SMA port free or route the antenna away from the board.
For most standalone builds, the SMA pigtail (Option B) is easiest. If you're doing a custom enclosure with a RAK or Heltec, Option C gives you the most flexibility.
What to buy:
- SMA female chassis mount (for ground plane): search "SMA female chassis mount panel connector", ~$8 for a pack of 10
- RG-174 pigtail SMA male (for dipole and Slim Jim): search "SMA male pigtail RG174 15cm", ~$8 for a pack of 5
- U.FL to SMA female pigtail (for Heltec V3 / RAK): search "U.FL IPEX to SMA female pigtail", ~$7 for a pack of 5
- 14 AWG solid bare copper wire: grab a foot at any hardware store, or on Amazon, you won't need much
- 300-ohm twin-lead (for the Slim Jim): search "300 ohm twin lead TV cable", a few dollars for more than you'll ever need
- SMA male-to-male adapter (if needed): search "SMA male to male adapter", ~$6 for a pack of 5
Total parts budget across all three builds: under $20, and you'll have leftovers for a few more antennas.
Antenna 1: Quarter-Wave Ground Plane
Difficulty: Easy. Cost: ~$3. Gain: ~2.1 dBi. Best for: Fixed rooftop or window nodes.
This is the one to build first. It's forgiving, it works, and the theory is simple: a vertical radiating element (λ/4 long) surrounded by radials that act as a fake ground plane. The radials are why you can mount this on a plastic enclosure and have it still perform, you're carrying your own ground with you.
The Math
λ = 327.6 mm

Radiator: λ/4 = 327.6 / 4 = 81.9 mm ≈ 82 mm (3.23 inches)

Radials:  λ/4 = 82 mm, or slightly longer
          Use 85–90 mm to give yourself tuning headroom
Radial count: 3 works, 4 is better. Bend them downward at 45° from horizontal. This raises the feed impedance from about 35Ω (horizontal radials) to about 50Ω (45°), which matches your coax without a balun. That 45° angle matters.

Build
- Cut one piece of 14 AWG solid copper wire to 82 mm. Strip if insulated.
- Cut four pieces to 85 mm for radials.
- Solder the 82 mm piece to the center pin of the SMA chassis mount.
- Solder the four radials equally spaced around the body of the connector.
- Bend the radials down at 45°.
- Done. That's the whole antenna.
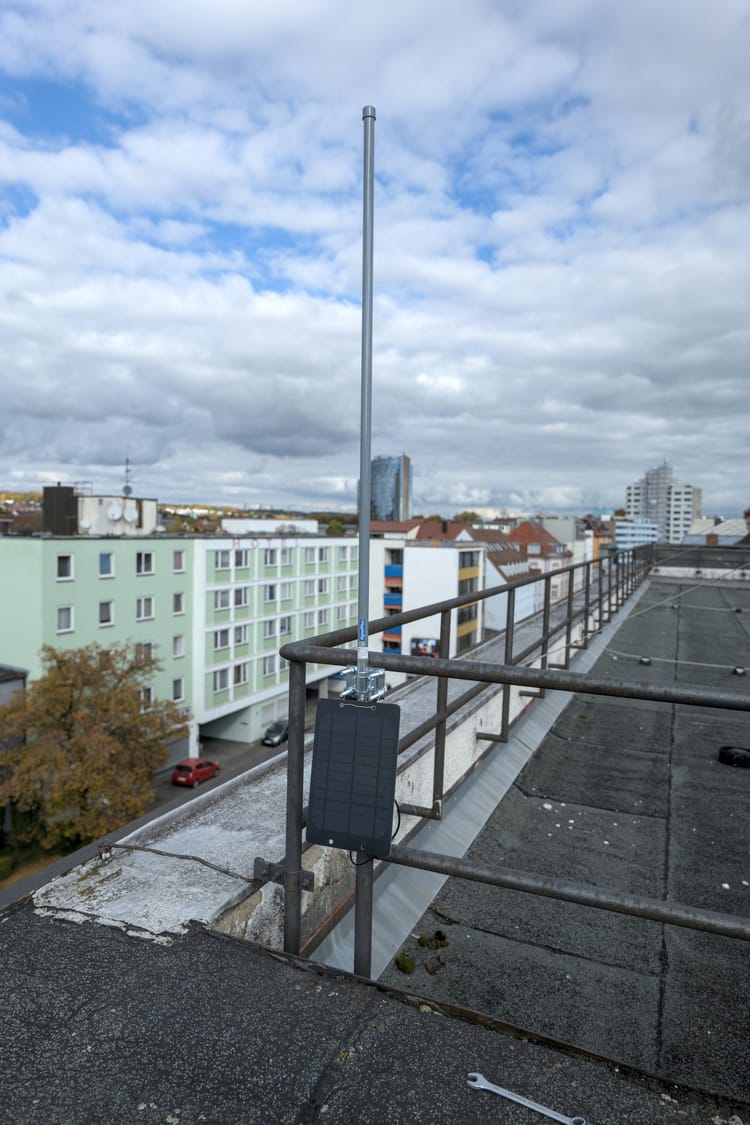
Mount it vertically. The radiator points up. Connect to your Meshtastic node with an SMA male-to-male adapter or a short jumper. If you can get it up high, attic, rooftop, pole, the RF pattern is an oblate donut that covers everything at the horizon, which is exactly where your mesh contacts are.
Antenna 2: Half-Wave Dipole
Difficulty: Easy. Cost: ~$4. Gain: ~2.15 dBi. Best for: Portable setups, indoor nodes, anywhere you can't use a ground plane.
A dipole is two quarter-wave elements pointing in opposite directions, fed from the center. No ground plane needed. You can tape it to a window, zip-tie it to a backpack, or hang it from a ceiling, as long as it's reasonably straight and vertical, it works.
The Math
λ = 327.6 mm

Each arm: λ/4 = 81.9 mm ≈ 82 mm (3.23 inches)
Total length: λ/2 = 163.8 mm ≈ 164 mm (6.45 inches)

Feed impedance: ~73Ω
SWR on 50Ω coax: ~1.5:1  (acceptable, you'll live)
The impedance mismatch between a 73Ω dipole and 50Ω coax is real but mild. You lose very little power. If you want to split hairs about it, you can use a 1:1 balun at the feed point, but for a Meshtastic node it genuinely doesn't matter.

Build
- Take your RG-174 pigtail. Strip the bare end: expose about 15 mm of center conductor, then pull back 15 mm of shield braid and twist it together.
- Cut two pieces of 14 AWG wire to 82 mm.
- Solder one wire to the center conductor of the pigtail.
- Solder the other wire to the shield braid.
- Orient them in a straight line, one pointing up, one pointing down.
- Heatshrink or tape over the feed point to weatherproof it.
That's it. The whole antenna is 164 mm long (about 6.5 inches). Mount it vertically, plug in the SMA, you're on the mesh. For durability, slide both arms into a short length of PVC pipe or heat shrink before soldering. A drinking straw works in a pinch. You're not designing spacecraft here.
Antenna 3: The Slim Jim
Difficulty: Medium. Cost: ~$4. Gain: ~3–4 dBi. Best for: Fixed base stations, rooftop nodes, anywhere you want the best range out of a homebrew build.
The Slim Jim (sometimes called a J-pole variant) is a half-wave radiating element with a quarter-wave matching section built right into the antenna. The matching section solves the impedance problem that plagues other end-fed half-wave designs, it transforms the high impedance at the end of a half-wave element down to something close to 50Ω, right where your coax connects. The result is a better pattern than a dipole (more signal at the horizon, less wasted going straight up), with no ground plane required.
Build it out of 300-ohm twin-lead TV cable. The whole antenna is about 8 inches long. You can weatherproof it in a piece of PVC and mount it anywhere.
The Math
300-ohm twin-lead has a velocity factor of approximately 0.82, meaning the signal travels at 82% of the speed of light through the cable. This shrinks the physical length you need to cut.
Free-space λ = 327.6 mm
Physical λ in twin-lead = 327.6 × 0.82 = 268.6 mm

Radiating section (λ/2):  268.6 / 2 = 134.3 mm ≈ 134 mm (5.28 inches)
Matching section  (λ/4):  268.6 / 4 =  67.2 mm ≈  67 mm (2.63 inches)

Total cable needed:        134 + 67 = 201 mm ≈ 200 mm (7.9 inches)
Cut 220 mm to give yourself trimming room.

Feed point: ~35 mm up from the bottom short
Gap:        ~12 mm cut in ONE conductor only, between the two sections
The feed point location is where you tune the antenna. Start at 35 mm from the bottom. If you have a NanoVNA (get one, they can be found for around $50 and worth every penny, or reach out on the Discord, and we may be able to help out), slide the feed connection up or down until SWR bottoms out.

Build
- Cut a piece of 300-ohm twin-lead to 220 mm.
- At the bottom, strip both conductors and solder them together. This is the matching section's short circuit, the "J" in J-pole.
- Measure 67 mm up from the bottom short. Carefully cut through one conductor only for about 12 mm using a hobby knife. The other conductor stays continuous.
- Measure 134 mm up from the top edge of the gap. Strip and solder both conductors together. This is the top short. Trim any excess above it.
- At 35 mm up from the bottom short, solder your RG-174 pigtail: center conductor to one side of the twin-lead, shield braid to the other.
- Weatherproof with heatshrink or self-amalgamating tape.
For a permanent installation, slide the whole thing into a 1/2" PVC pipe, seal the ends, and mount it vertically. It looks like a short white stick and outperforms anything in a retail box at the same price point.
Which One Should You Build?
Build the quarter-wave ground plane if: You have a fixed node going on a rooftop, a window sill, or outdoors, and you want the simplest possible build. It takes 20 minutes. Start here.
Build the dipole if: You're running a portable node, an indoor node, or anything that needs to move around. No ground plane means you can orient it however you need to. Also 20 minutes.
Build the Slim Jim if: You have a stationary base node, you've already built the other two and want more range, or you just like an excuse to use your soldering iron. The extra dB is real. So is the extra patience required during assembly.
All three will outperform the rubber duck you started with. Any of them, mounted higher than your original node, will probably double your effective range. Height beats gain, every time, but building both costs nothing.
A Few Things That Will Save You Grief
Trim from long, not short. Cut your elements slightly longer than the math says, then trim in small increments until you hit resonance. You can remove wire. You cannot add it back.
Keep the solder joints small and clean. A cold joint at the feed point raises SWR and costs you signal. Tin both surfaces first, then join them.
Get a NanoVNA. A vector network analyzer used to cost thousands of dollars. Now they're ~$80 on Amazon. Search "NanoVNA H4" and buy one, or ask in the NEPAMesh Discord, someone may be willing to help out. Being able to actually measure your antenna's resonance instead of guessing is the difference between a working homebrew antenna and a frustrating afternoon.
Mount it vertically. These are vertically polarized antennas for a vertically polarized network. Tilting it 45° costs you 3 dB. Laying it horizontal costs you 20 dB. Keep it straight up.
Coax runs kill signal. Every meter of RG-174 at 915 MHz costs you about 0.8 dB of loss. If you're running 10 meters of it to get from your node to a rooftop antenna, you've already given up more than you gained from the homebrew build. Use short runs, use better coax (LMR-195 or LMR-400), or put the node at the antenna end and run power instead.
The mesh is only as good as the antennas on it. The rubber duck isn't keeping up with the network we're building. An afternoon and $5 in wire will change that.
Build something. Put it up. Tell us how it works in the NEPAMesh Discord.
Meshtastic is a registered trademark of Meshtastic LLC. No warranty is provided, use at your own risk. This post is not endorsed by or affiliated with Meshtastic LLC.