Putting a Node Outside: Enclosures, Weatherproofing, and Not Destroying Your Hardware
So you built an antenna. Now you need to put it somewhere useful, which means outside, which means the elements are going to try to kill it. Rain gets in. Condensation forms inside. UV degrades plastic. Squirrels exist. A node that lives in your attic is better than a rubber duck on your desk, but a node on the roof is better than both.
This post covers how to get your Meshtastic hardware outside and keep it there, enclosures, cable entry, waterproofing connectors, mounting, and a few mistakes that are much cheaper to read about than to make yourself.
IP Ratings: What They Actually Mean
Every weatherproof enclosure you'll encounter has an IP (Ingress Protection) rating. The two numbers after "IP" tell you how well it keeps out solids and liquids.
The first digit is dust (0–6). The second digit is water (0–9). For outdoor nodes:
- IP65, dust tight, protected against low-pressure water jets from any direction. Fine for a covered porch or under a roof overhang.
- IP67, dust tight, submersible to 1 meter for 30 minutes. Good for exposed outdoor mounting.
- IP68, dust tight, submersible beyond 1 meter. Overkill for a mesh node, but it won't hurt.
The rating only applies to the enclosure as sold, with all its original seals in place. The moment you drill a hole in it for a cable, the rating is meaningless until you reseal that hole properly. More on that shortly.
Enclosure Options
Option 1: Weatherproof Electrical Box (Budget Pick)
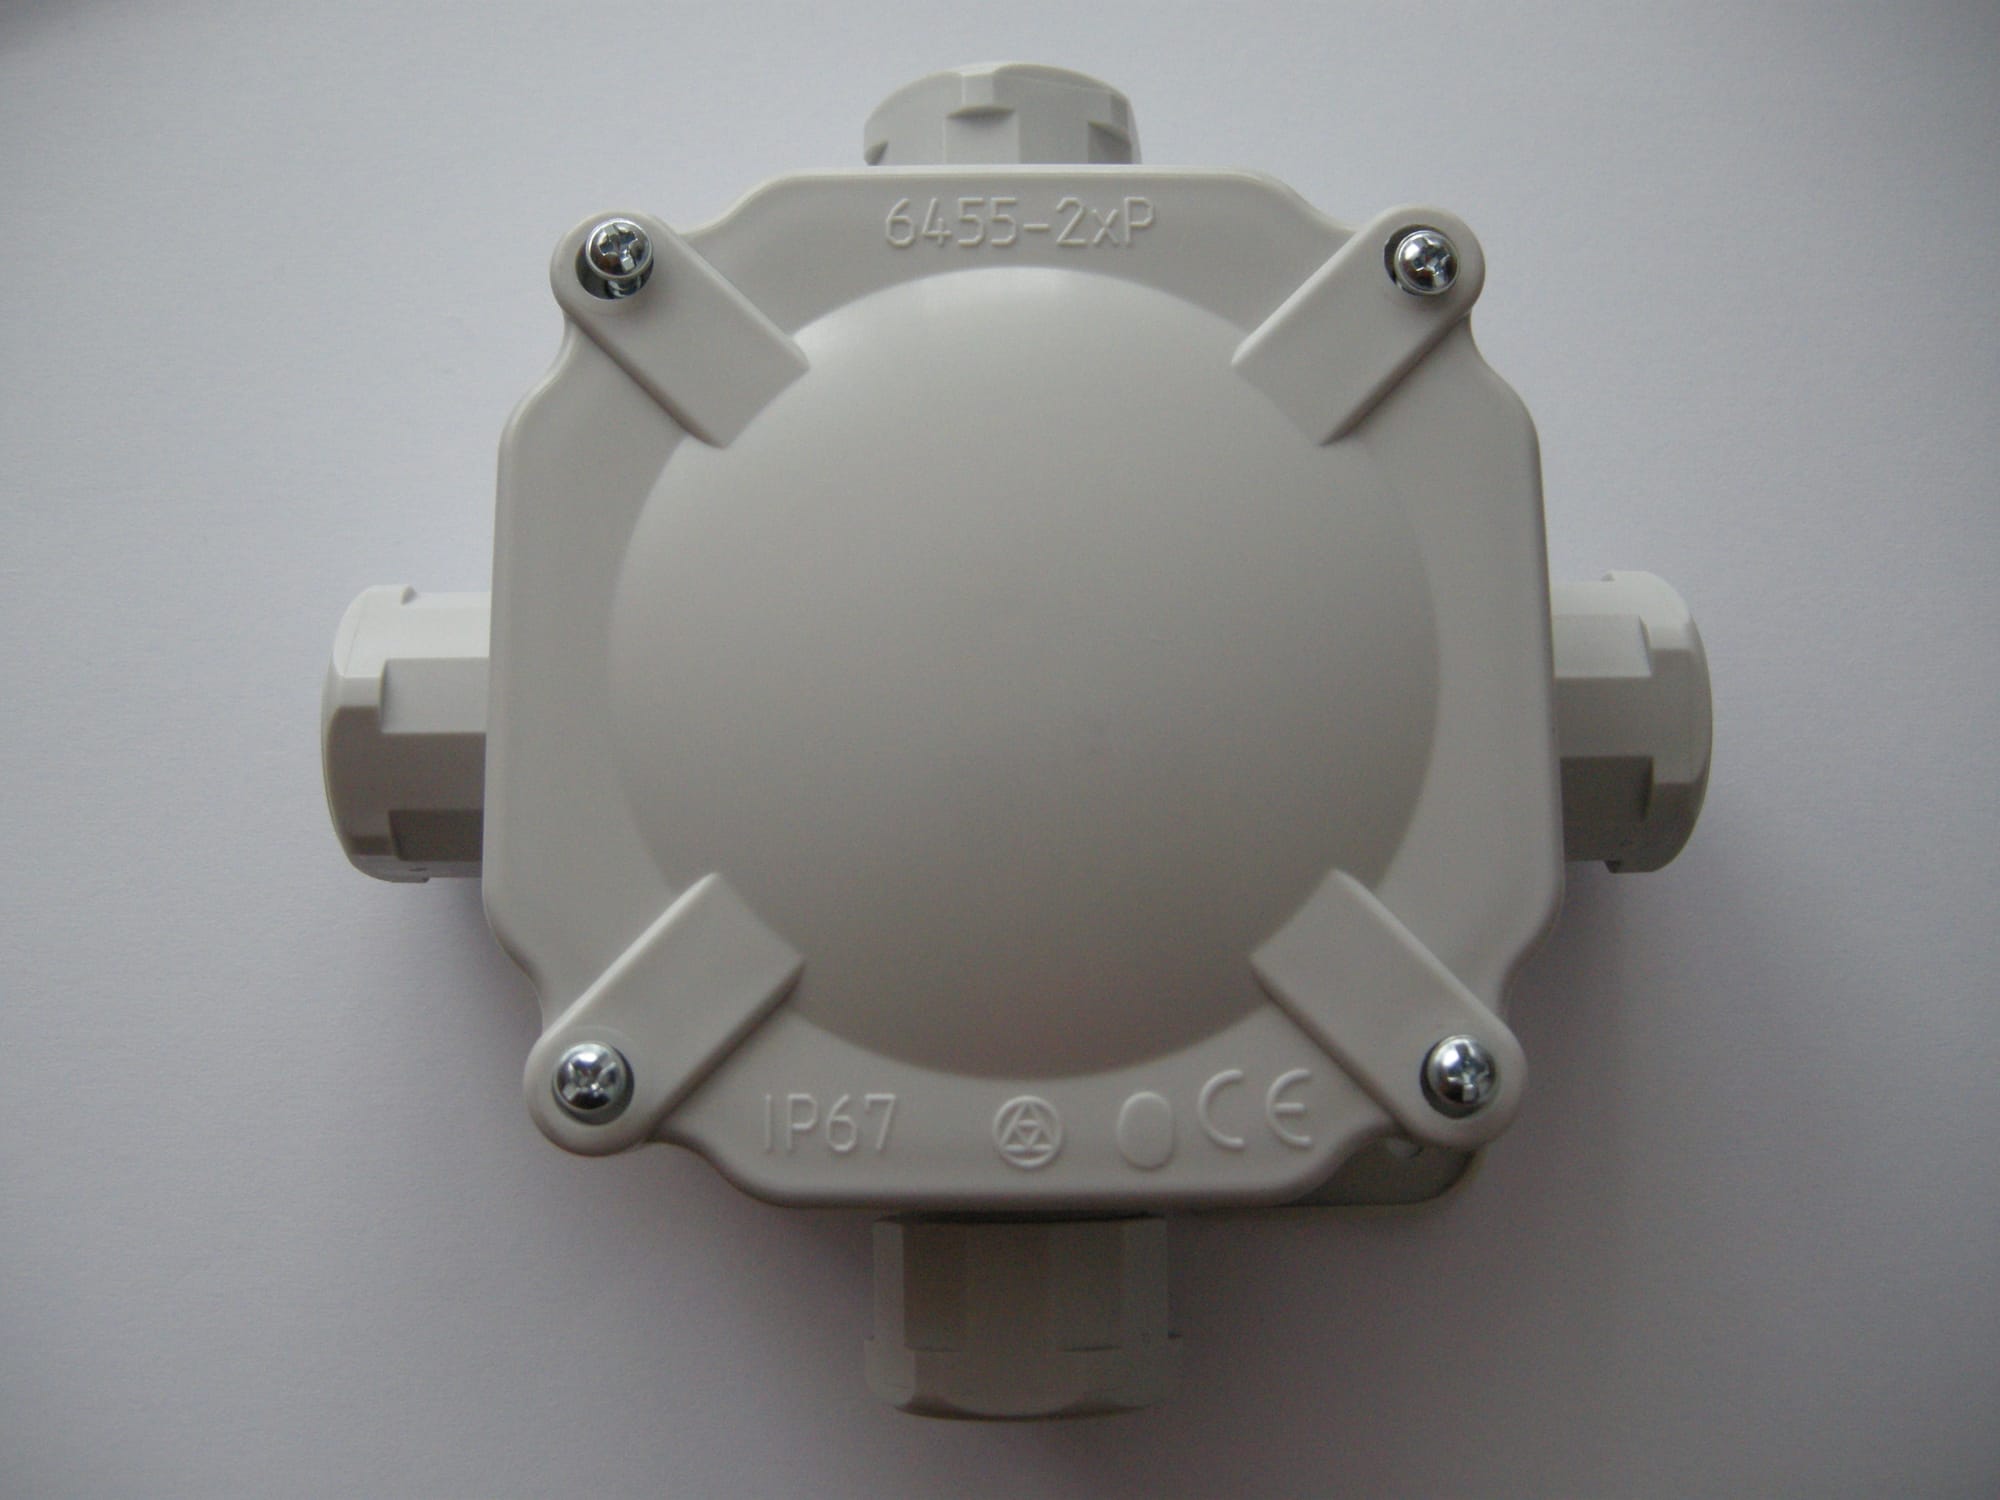
Gray polycarbonate weatherproof electrical boxes, the kind electricians use for outdoor outlets and junction boxes, are available at any hardware store for $8–15. They're rated IP65 or IP67, they're UV-resistant, they have integrated mounting flanges, and they come in sizes that fit a Heltec V3 or RAK WisBlock module with room to spare.
Look for boxes in the 4" × 4" or 6" × 4" range. The kind with a clear polycarbonate lid is handy for checking status LEDs without opening the box. The kind with a gasket-sealed lid is what you actually want for weatherproofing. Ideally: both.
Good search terms: "IP67 polycarbonate enclosure junction box 100x68mm", you'll find them from Bud Industries, Hammond, and a dozen no-name brands on Amazon. The no-name ones are fine. The gasket is the part that matters, and they all use the same foam gasket.
Cost: $8–15.
Option 2: PVC Pipe Node (Simplest Possible Build)
If you built the Slim Jim antenna from the previous post, you already know that 1/2" PVC pipe makes an excellent weatherproof housing. The same logic scales up: a 2" PVC pipe with end caps will house a Heltec V3, a small LiPo, and a short pigtail, and it's completely waterproof when the caps are glued.
The build:
- 2" schedule 40 PVC pipe, cut to length (usually 150–200mm)
- Two end caps, one glued permanently, one threaded for access
- Drill a small hole in the top cap for the antenna SMA bulkhead
- Run your power cable through a cable gland in the bottom cap
The whole thing mounts to a pole or mast with a PVC strap or a pair of hose clamps. Paint it with Krylon Fusion if you care about UV. It looks like a plain white pipe and nobody will bother it.
Cost: Under $5 in pipe and fittings. You'll have leftover pipe for two more builds.
Option 3: Pelican-Style Hard Case (Best Protection)
Pelican cases and their clones (Nanuk, Apache from Harbor Freight) are the gold standard for serious outdoor deployments. They have O-ring seals, pressure equalization valves, padlock hasps, and they're rated IP67 or better. Overkill for a mesh node? Probably. Worth it if the node is going somewhere hard to reach, a rooftop, a tower, a hilltop, where you won't be servicing it often.
The Harbor Freight Apache cases in the 3800 or 4800 size fit a Meshtastic node, a small solar charge controller, and a battery with room for foam cutouts. They cost $25–40. The Pelican equivalents are $80–150 and are genuinely worth it if the deployment matters.
For a quick cost-effective build, the Apache cases are hard to beat. The seals are good. The latches are solid. And if it gets destroyed by a falling branch, you're out $30 instead of $130.
Cost: $25–40 (Apache) or $80–150 (Pelican).
Option 4: 3D Printed Case
If you have access to a printer, custom enclosures are genuinely useful here, you can design exactly the cutouts you need for your specific board and antenna connector, with a lid profile that matches a standard foam or silicone gasket.
The catch: standard PLA is not suitable for outdoor use. It absorbs moisture, warps in heat, and UV degrades it within a season. Use PETG (better UV/moisture resistance, slightly flexible) or ASA (excellent UV resistance, specifically designed for outdoor use) for anything that's going outside. Print the lid with a recessed channel for a foam cord gasket, and use stainless M3 screws to clamp it down.
Thingiverse and Printables both have Meshtastic-specific enclosure designs for the Heltec V3, T-Beam, and RAK modules. Search the board name plus "enclosure" or "case" and you'll find options with antenna cutouts already placed correctly.
Cost: Filament + your time. PETG is about $20/kg; you'll use less than 100g per enclosure.
Cable Entry: The Part Everyone Gets Wrong
The enclosure keeps water out. The cable entry is where water gets back in.
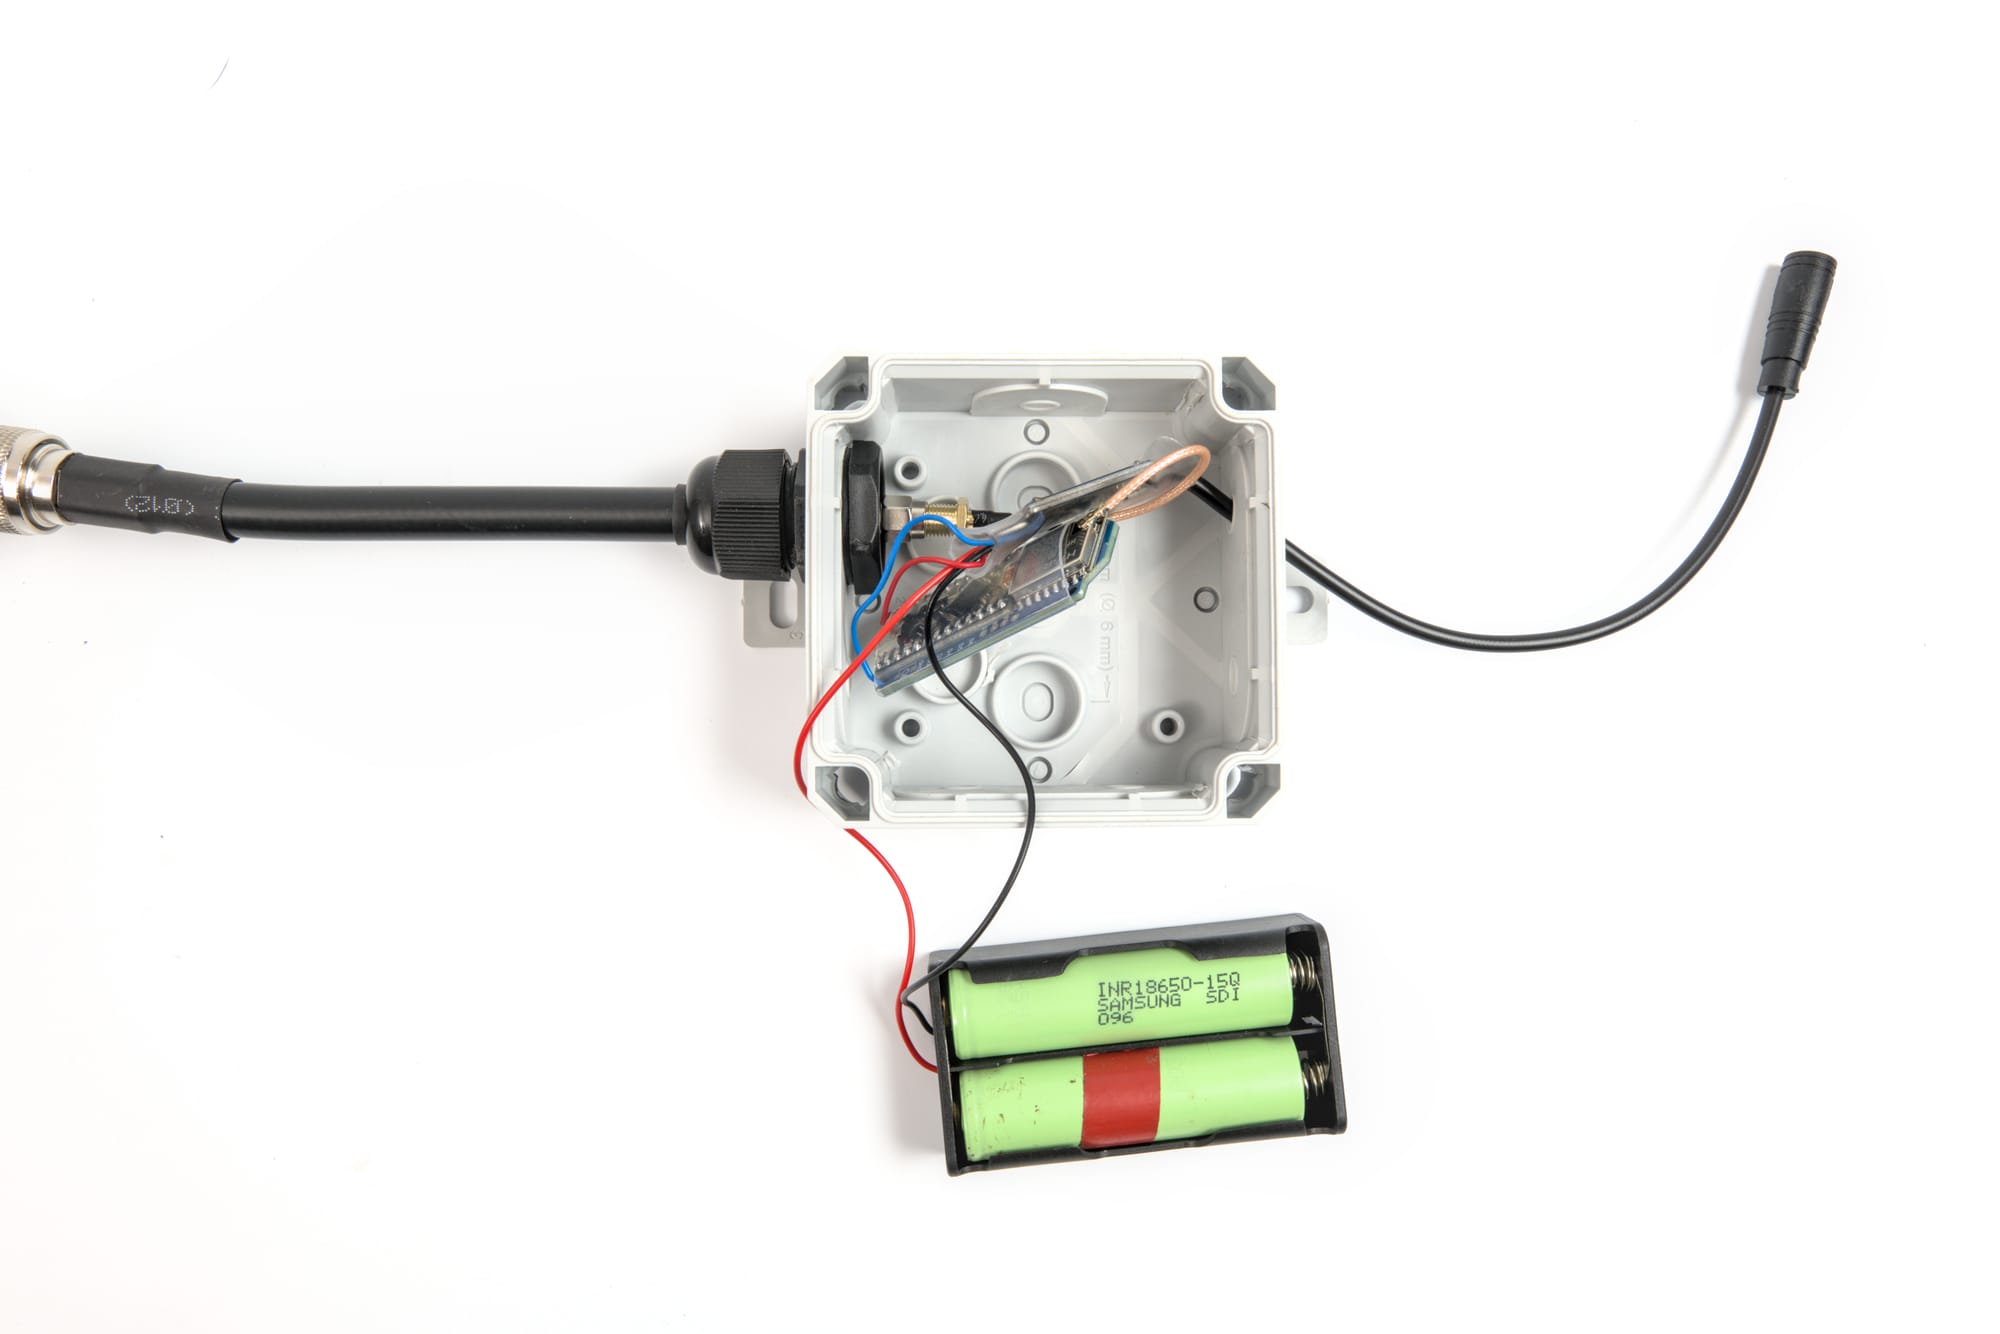
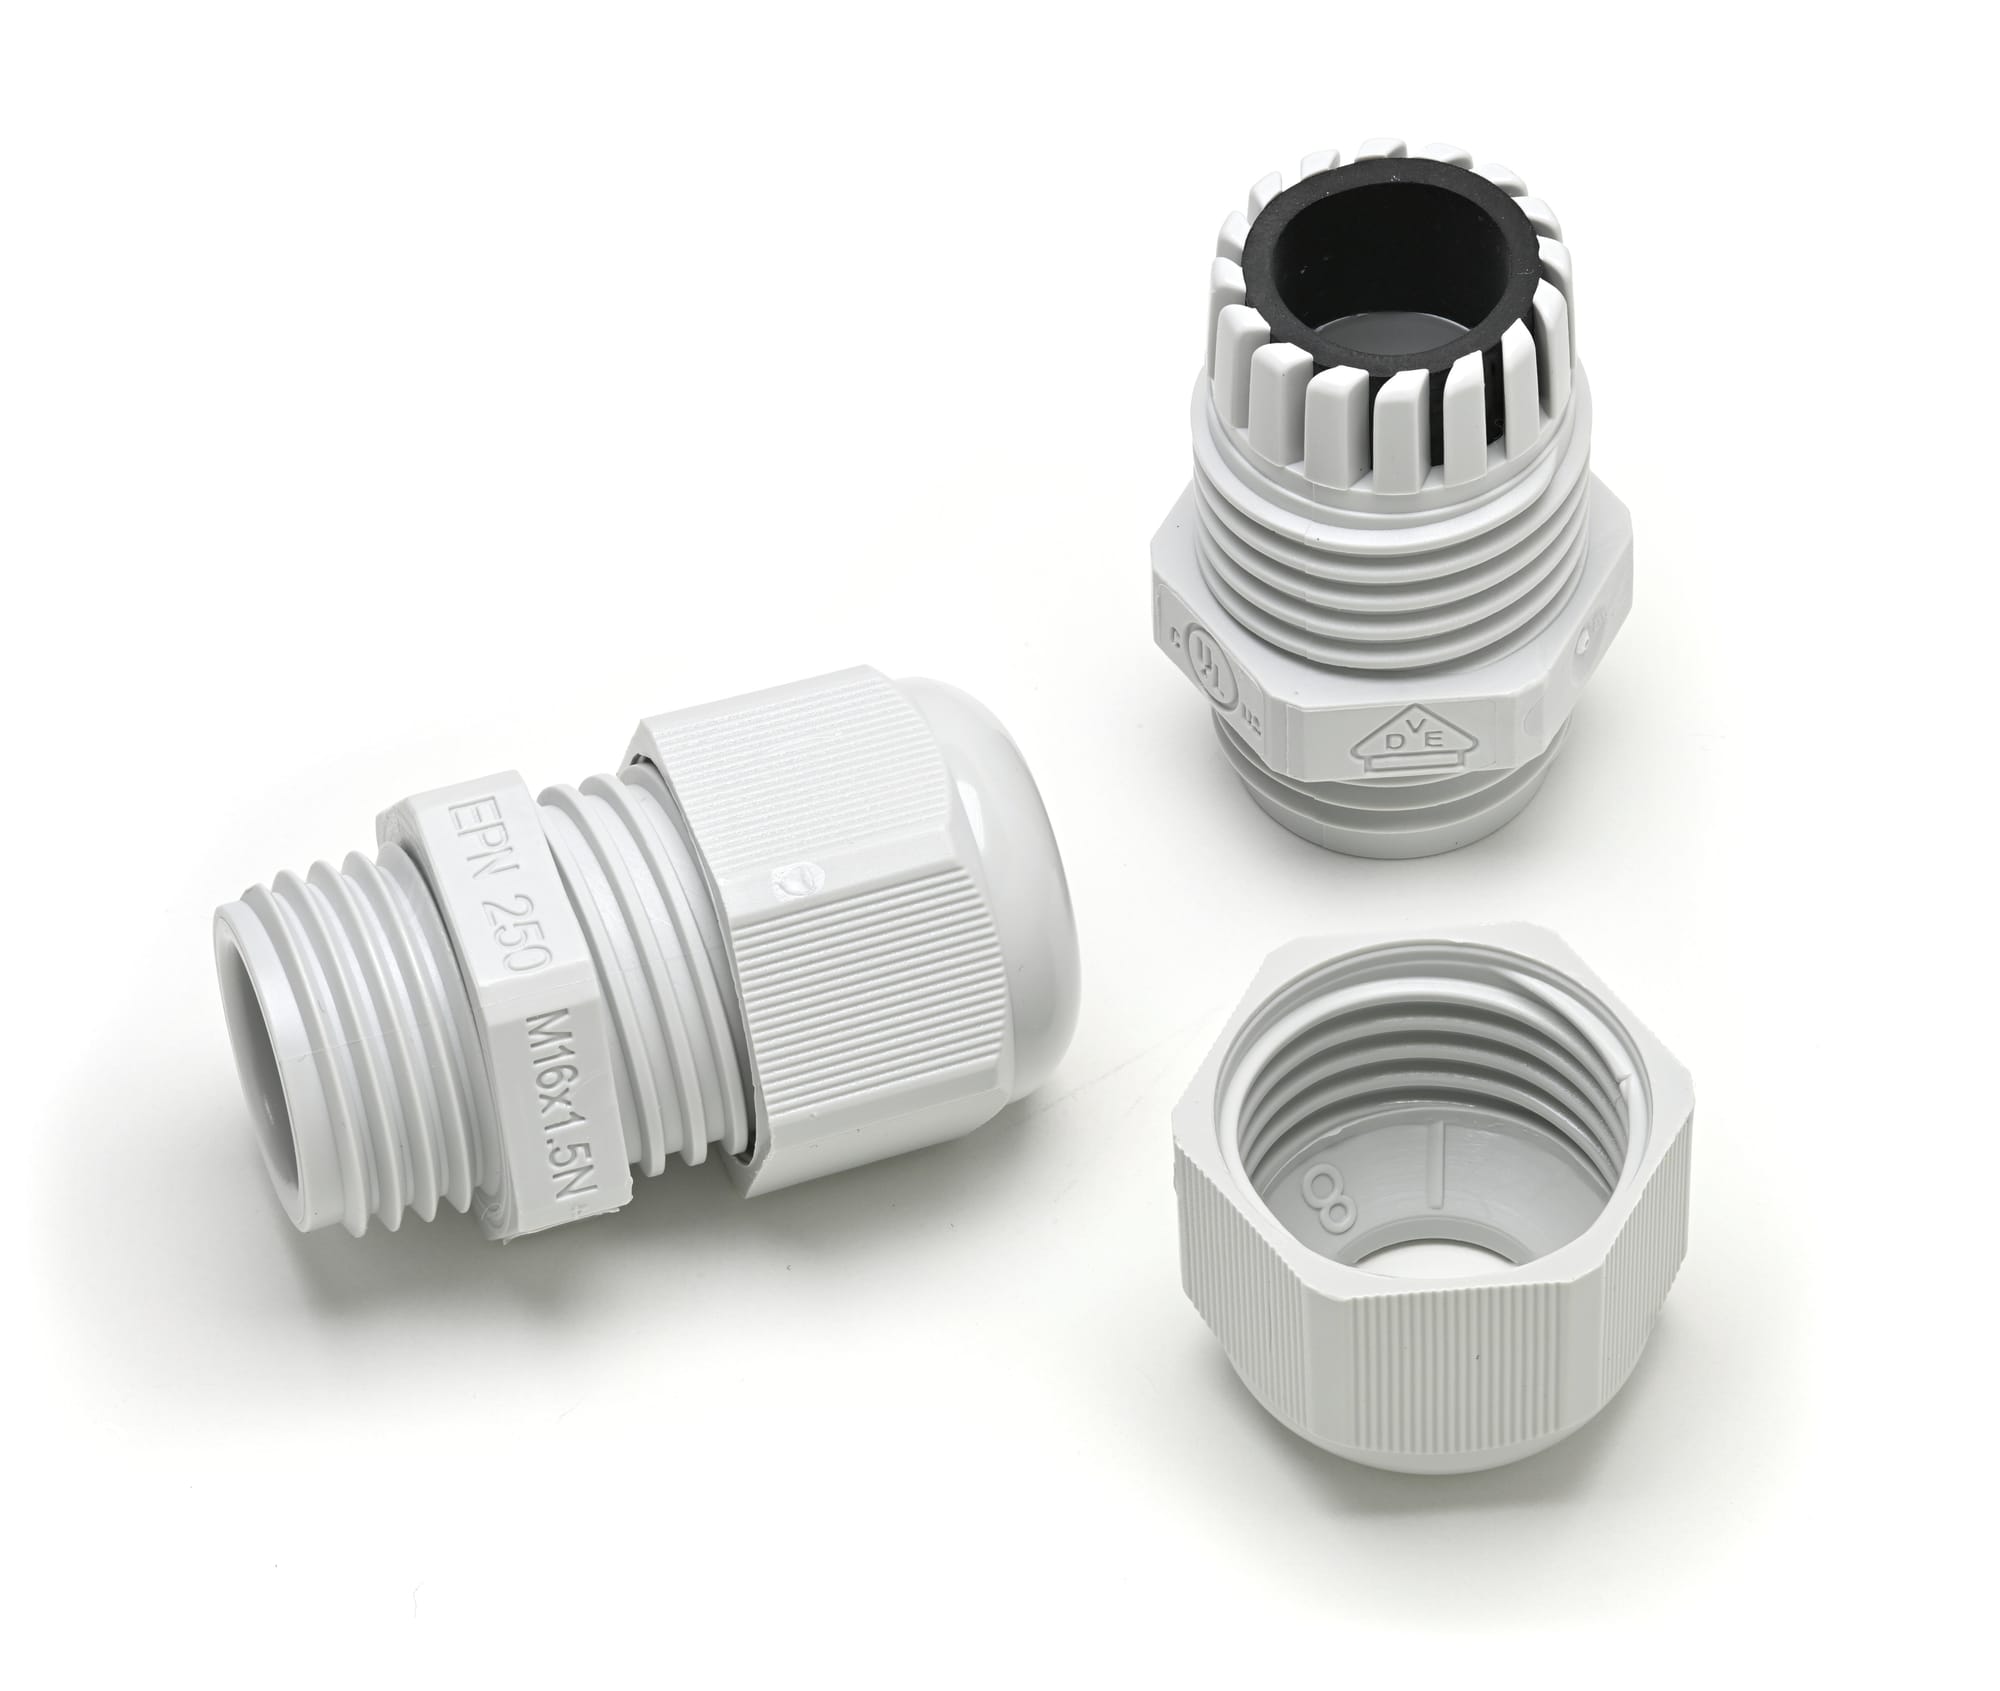
Cable glands (also called PG glands or cord grips) are the right solution. They're a compression fitting that grips the cable and seals against the enclosure wall. A PG7 gland fits cables from about 3–6.5mm in diameter, which covers most USB cables and small coax. A PG9 gland covers 4–8mm. They cost about $1 each and are sold in packs on Amazon.
Installation:
- Drill a hole the correct diameter for the gland thread (usually 12mm for PG7, 15mm for PG9).
- Thread the gland into the hole and tighten the locknut on the inside.
- Run your cable through, tighten the compression nut until it grips.
- Apply a thin bead of silicone sealant around the outside where the gland meets the enclosure wall.
Do not use bare holes with hot glue. Do not use electrical tape. Cable glands exist for a reason.
What to buy: Search "PG7 cable gland waterproof", you'll get a pack of 10 for about $7. Buy two sizes.
Antenna Connection: Getting RF Out of the Box
You have two options for getting your antenna connected to a sealed enclosure.
SMA Bulkhead Feedthrough
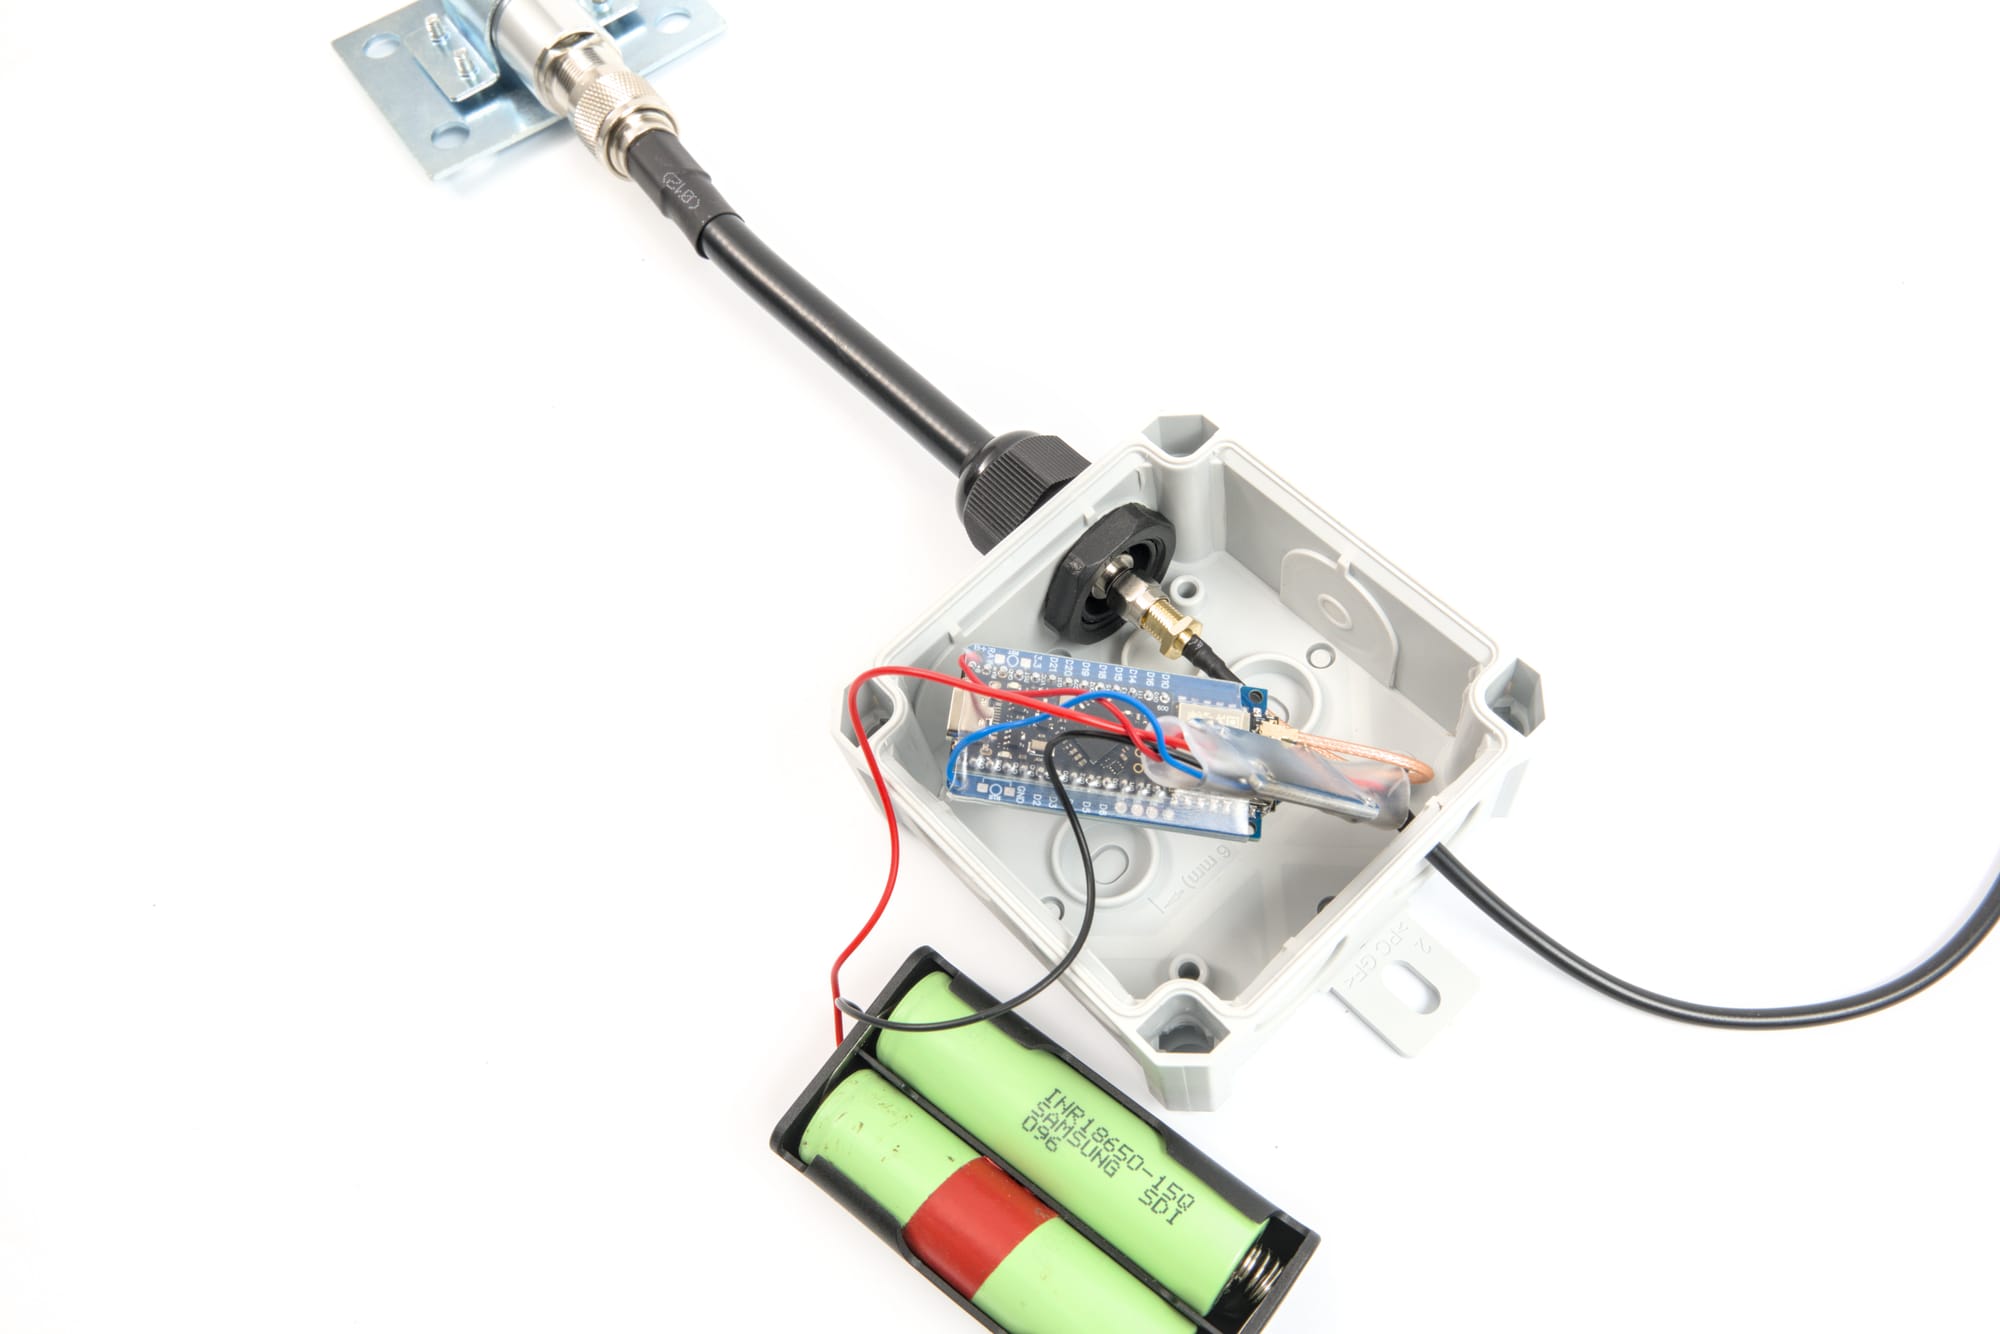
An SMA female chassis-mount connector threads into a hole in the enclosure wall. Your antenna connects on the outside; a short pigtail runs to the board on the inside. This is the cleanest solution.
Drill a 6.5mm hole, thread the SMA chassis mount through, tighten the nut on the inside. Run a short SMA male-to-male jumper (50–100mm) from the bulkhead to the board's antenna port. Apply self-amalgamating tape around the outside of the connector body for extra weatherproofing.
What to buy: "SMA female chassis mount panel connector", same as the ground plane build from the antenna post. You probably already have some.
Run the Cable Through a Gland
If your antenna is on a separate mast above the enclosure, run the coax pigtail through a PG-gland cable entry instead. The coax doesn't care about being bent through a gland, and you can run it as far as needed to reach the antenna.
One caution: seal the top of any exposed coax connector with self-amalgamating tape. Water wicks into coax from the cut end and from around the connector shell. An unsealed SMA connection on a rooftop antenna is a corrosion problem waiting to happen.
Waterproofing Connectors
Any RF connection that lives outside needs to be weatherproofed after assembly.
Self-amalgamating tape (also called self-fusing silicone tape) is the standard approach. It's not actually sticky, it fuses to itself when stretched and wrapped. Wrap it over the mated SMA connection in overlapping layers, extending past the connector on both sides. It forms a solid silicone mass that water cannot penetrate. It also comes off cleanly when you need to disconnect.
Coax seal (also called Coax-Seal or butyl tape) is an alternative, a sticky, putty-like compound that fills gaps and voids around connectors. Easier to apply than self-amalgamating tape, harder to remove, and slightly less durable long-term. Good for a permanent installation you don't plan to touch.
What to buy: "self-amalgamating tape" or "self-fusing silicone tape", a roll is about $8 and lasts for many builds.
Mounting
J-Mount / Mast Bracket
A J-mount (the kind used for satellite dishes and small antennas) lets you attach to a fascia board, a wall, or a pole with two lag screws. The vertical pipe section of the J-mount gives you a mast for your antenna and a place to strap the enclosure below it. J-mounts are available at hardware stores and big-box home improvement stores for $10–20.
Pole or Mast Strap Mount
Hose clamps work. Two large stainless hose clamps around a PVC or electrical conduit mast, looped through mounting holes on the enclosure, will hold a node securely. Not elegant, but it works and costs about $2.
Direct Wall Mount
Most enclosures have molded mounting flanges with 4mm holes. Four stainless screws into the wall or a wood block, and you're done. Use stainless or at least galvanized hardware, zinc-plated screws will rust within a season outdoors. The cost difference is about $2. Pay it.
Power
USB Through a Cable Gland
The simplest power solution: run a USB cable through a PG9 cable gland from an outdoor-rated outlet, a weatherproof outlet box, or a solar charge controller. Use a short run, every meter of USB cable at 5V matters more than it does at 12V.
Outdoor-rated USB power adapters exist (look for "outdoor GFCI outlet" enclosures with USB ports built in). Alternatively, run 12V from a solar controller to a DC-to-USB buck converter inside the enclosure.
PoE (Power over Ethernet)
If you're running an Ethernet cable to the node for any reason, some people do for monitoring, standard 802.3af PoE injectors deliver 48V over the Cat5/6 cable, and a small PoE splitter inside the enclosure converts it to USB 5V. Ethernet runs longer than USB without voltage drop issues, and the cable itself handles the PG gland entry cleanly.
Solar
A 5W or 10W panel, a 2000–3000 mAh LiPo or 18650 cell pack, and a TP4056-based or CN3791-based solar charge controller will run a Heltec V3 or RAK WisBlock indefinitely in most climates. The node draws roughly 80–120 mA active, less with sleep modes enabled. A 2000 mAh cell will run it through a cloudy day without the panel contributing anything.
A proper solar build deserves its own post, sizing the panel and battery for NEPA's actual sun hours, choosing a charge controller that doesn't cook your LiPo in July, and positioning the panel for winter sun angles. For now: a 5W panel and a 2Ah battery will work for a node that sees a few hours of sun a day.
Battery Safety: This Is the Part You Actually Need to Read
LiPo (lithium polymer) and lithium-ion cells are excellent batteries. They're also genuinely hazardous if mistreated, not "void your warranty" hazardous, but "the enclosure is on fire" hazardous. Outdoor deployments introduce conditions that accelerate the ways things go wrong. This isn't meant to scare you off battery power; it's meant to help you not have a bad day six months after you sealed the enclosure and forgot about it.
Temperature Is the Big One
Lithium cells have a narrow comfortable operating range, and NEPA tests both ends of it.
Cold: Below 0°C, lithium cells lose capacity rapidly, you might get 60–70% of rated capacity at 0°C, and less as it drops further. More importantly, charging a lithium cell below 0°C causes permanent damage. Lithium dendrites form on the anode, reducing capacity and, in bad cases, creating internal short circuits that can lead to thermal runaway. A node with a solar charge controller running in January in NEPA will attempt to charge its battery at sub-zero temperatures unless the controller has a low-temperature cutoff. Most cheap TP4056 boards do not. This is the most common failure mode for outdoor solar nodes and the one people are least likely to anticipate when they're building in July.
The fix: use a charge controller with a temperature sensor and low-temperature charge cutoff (the CN3791 has this; look for controllers with an NTC thermistor input), or switch to LiFePO4 (lithium iron phosphate) cells. LiFePO4 can be safely charged down to about -20°C, has a much longer cycle life, and is substantially more thermally stable. The tradeoff is lower energy density, a LiFePO4 pack is larger and heavier for the same capacity. For a fixed outdoor node, that's usually not a problem.
Heat: A sealed dark enclosure in direct summer sun can reach 60–70°C inside. LiPo cells should not be stored above 45°C for any length of time; at higher temperatures, the electrolyte degrades, capacity drops permanently, and the risk of venting and thermal runaway increases. A black junction box zip-tied to a south-facing surface in July is a very real problem. Use a light-colored enclosure, mount in shade where possible, and consider adding a small vent with a Gore-Tex membrane (which passes air but not liquid water) if the enclosure will see sustained heat.
Swelling and Physical Damage
A LiPo pouch cell that is swelling (puffing up, visibly bulging) is failing and should be considered a fire hazard. Do not puncture it, do not charge it further, do not leave it in an enclosed space while it continues to swell. Remove it carefully, discharge it completely by connecting it to a resistive load, and dispose of it at a battery recycling point. A sealed outdoor enclosure that you open after a year to find a swollen pouch cell needs to be dealt with outdoors, away from anything flammable.
18650 cylindrical cells in a proper holder are meaningfully more robust than bare LiPo pouches for outdoor use. The metal can resists physical damage and the cell chemistry is essentially the same. If you're building a battery pack for a permanent outdoor node, 18650s in a holder are the better choice over raw pouch LiPo cells.
Fusing and Short Circuit Protection
Any battery pack that isn't protected by a dedicated BMS (Battery Management System) should have an inline fuse between the pack and the load. Most TP4056 boards have over-charge and over-discharge protection but not short circuit fusing at useful current levels. A fuse rated at 2–3A on the output side of your battery pack costs pennies and prevents a wiring mistake from becoming a thermal event inside a sealed enclosure.
The Practical Summary
- Use LiFePO4 cells for unattended outdoor winter deployments, the temperature safety margin is worth the larger size
- Use a charge controller with a temperature sensor and low-temp cutoff if you're in a climate that drops below freezing
- Mount enclosures out of direct sun, or use a light-colored enclosure
- Inspect batteries at least once a year, open the enclosure, look for swelling, smell for off-gassing
- Never seal a damaged or swollen cell inside an enclosure
- Fuse your battery output
Firmware Updates and Planning for the Future
A node you can't reach is a node you can't update. Meshtastic releases firmware fairly frequently, bug fixes, new features, protocol updates. Running firmware from eighteen months ago isn't catastrophic, but it can mean missed improvements and, eventually, compatibility issues with newer nodes on the mesh. Before you seal something in a box and put it on a roof, think about how you're going to maintain it.
Plan for Physical Access
Mount the enclosure somewhere you can actually reach with a ladder or without a roofing contractor. Leave a service loop of cable slack inside the enclosure so you can pull the board out without desoldering anything. If you're using a Pelican or Apache case, the latches open without tools, that's a feature, not just weather sealing. For junction boxes with screws, leave a screwdriver clipped to the mounting hardware. Future-you will appreciate it.
If physical access is genuinely difficult, a tower, a rooftop, a hilltop installation, plan for it upfront. Run a USB cable to a weatherproof panel connector on the outside of the enclosure so you can plug in for a wired update without fully opening the box. A waterproof USB-A female panel mount connector (search "IP67 USB panel mount") costs about $5 and makes a hard-to-reach node serviceable without a full disassembly.
OTA Updates: What Works and What Doesn't
Meshtastic supports over-the-air firmware updates for some platforms via Bluetooth, which is convenient if the node is within BLE range (~10 meters) of a phone.
ESP32-based nodes (Heltec V3, LILYGO T-Beam, T-Deck): These can be updated via the Meshtastic web flasher over USB, or via the Meshtastic mobile app's OTA update feature over Bluetooth. The web flasher is the most reliable method, plug in, select your board, flash. You can also use the Meshtastic Python CLI (meshtastic --flash) if you're comfortable in a terminal.
RAK WisBlock (nRF52840-based): The nRF52 architecture uses a different update path than ESP32. The Meshtastic mobile app can push OTA updates over BLE, but the most reliable method for a fresh firmware install or a recovery situation is nRF Connect for Mobile.
Updating a RAK WisBlock with nRF Connect
- Install nRF Connect for Mobile on Android or iOS (free, from Nordic Semiconductor).
- Download the Meshtastic firmware
.zipfor your specific RAK board from the Meshtastic firmware releases page on GitHub. The filename will include your board variant (e.g.,firmware-rak4631-x.x.x.xxxxxxx.zip). Do not unzip it, nRF Connect takes the zip directly. - Put your RAK into bootloader/DFU mode. On most RAK WisBlock boards, double-press the reset button rapidly, the status LED will pulse slowly to confirm bootloader mode. If your board has a dedicated DFU button, hold it while pressing reset. (This kind of defeats the purpose of updating over Bluetooth since you need to be physically next to the board)
- Open nRF Connect → Scanner tab → find your device (it will appear as "DfuTarg" or similar in bootloader mode) → Connect.
- Tap the DFU icon (the upward arrow in the top right of the connected device screen) → select "Distribution packet (ZIP)" → navigate to the firmware zip you downloaded.
- Start the update. It takes 60–90 seconds. The board will reboot automatically when done.
If the board doesn't show up in bootloader mode, try the double-press again, the timing window is short, about half a second between presses. If it still doesn't appear, connect via USB and use the web flasher instead; some early RAK builds require a USB flash to recover from certain states.
Set a Reminder
Seriously, put a recurring calendar reminder to check your outdoor nodes. Every six months is reasonable: open the enclosure, inspect the battery, check the firmware version in the Meshtastic app, replace the desiccant, verify the antenna connection is still sealed. A node that gets that treatment will run for years. A node that gets forgotten will eventually be found swollen, corroded, or running firmware from a different era of the project.
A Few Things That Will Save You Grief
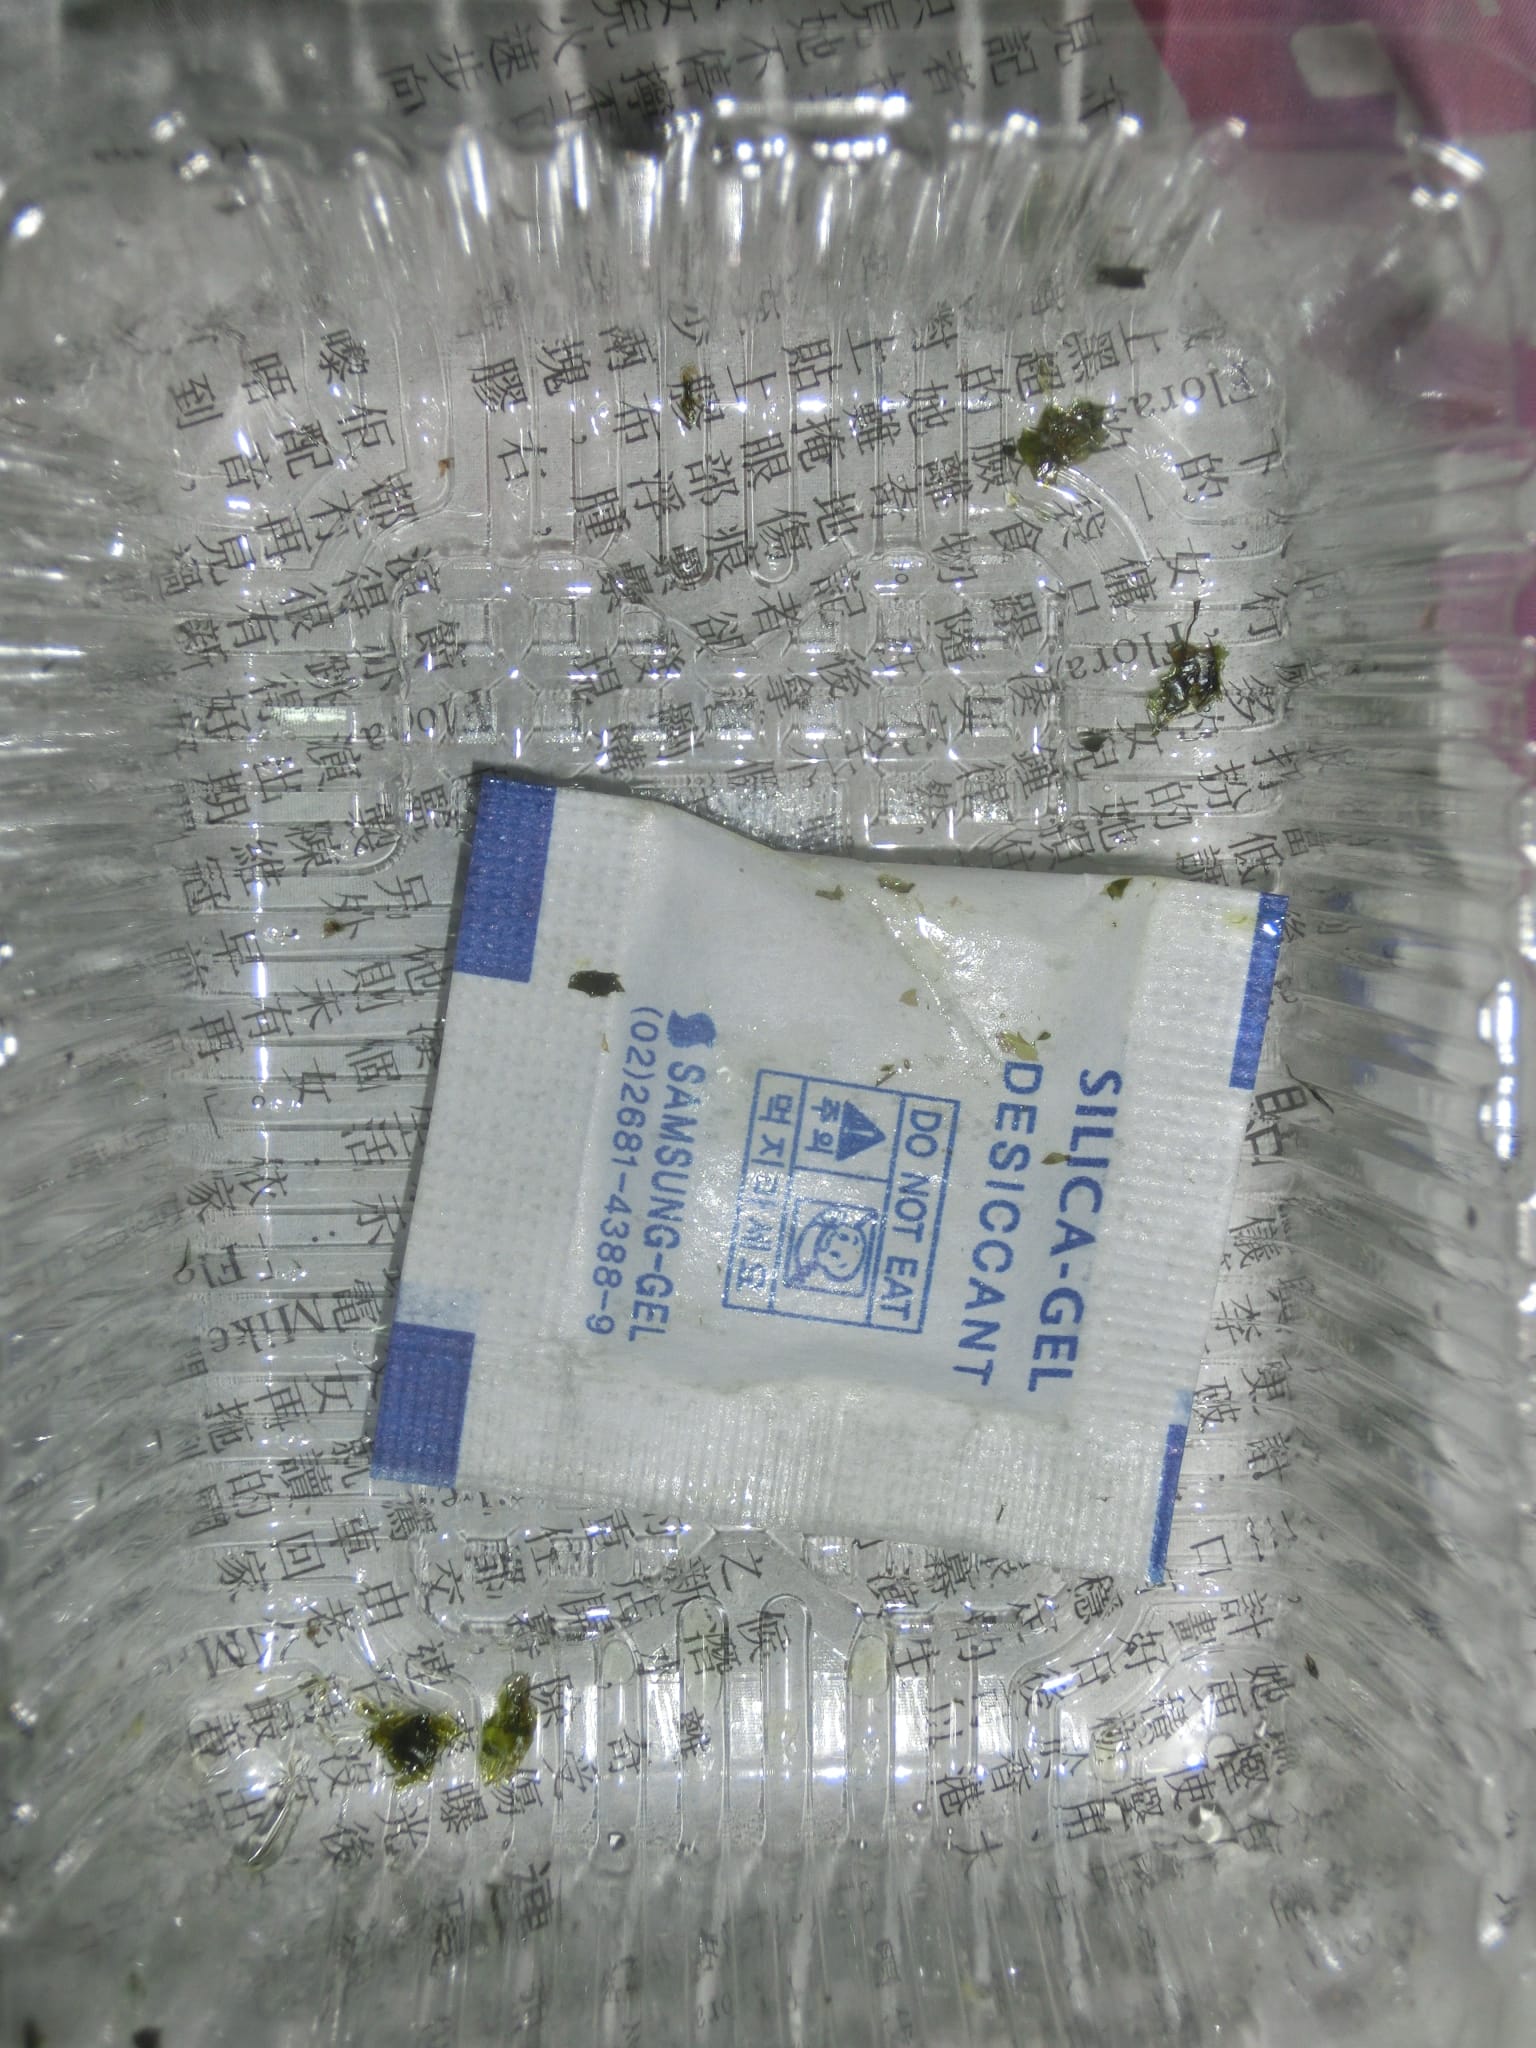
Condensation is the enemy, not rain. A sealed enclosure in a hot day/cold night cycle will breathe, warm moist air gets in through imperfect seals, then condenses on the cold interior when night falls. A silica gel desiccant pack inside the enclosure absorbs that moisture before it reaches your board. Replace it once a year.
Orient cable entries downward. Any hole in the enclosure should point down, not up or sideways. Gravity is your waterproofing friend.
UV kills plastic. Even "weatherproof" enclosures can degrade in direct sun over years. A light coat of UV-protective paint or a shaded mounting position extends enclosure life significantly.
Label your nodes. A piece of outdoor-rated label tape on the enclosure with the node name, your callsign or contact, and the install date costs nothing and saves hours of confusion when you're on a ladder six months later trying to remember which node this is.
Stainless everything. Any hardware that's going outside, screws, hose clamps, bolts, should be stainless steel or marine-grade zinc. Standard hardware-store zinc-plated fasteners will rust and seize within a year.
A node on your desk helps you. A node on your roof helps the mesh. The difference between "outside" and "destroyed by the second rainstorm" is a $10 enclosure and a cable gland. Get it outside.
Build something. Mount it high. Tell us where it is in the NEPAMesh Discord.
Meshtastic is a registered trademark of Meshtastic LLC. No warranty is provided, use at your own risk. This post is not endorsed by or affiliated with Meshtastic LLC.